Category: Lego Fan Plans

  • Turn Your Love of LEGO® MOC Building Into a Side Hustle

    Turn Your Love of LEGO® MOC Building Into a Side Hustle

    A practical, step‑by‑step guide to selling instructions, landing commissions, teaching classes, and using our LEGO1 generators to work faster.

    Published by TacoCat in Texas • Last updated: November 6, 2025

    If you love building LEGO® MOCs (My‑Own‑Creations), you’re already part of a thriving creative world. And here’s the best part—your passion doesn’t have to stay a hobby. With today’s digital tools, including our LEGO1 generator system, it’s easier than ever to turn creative energy into a real side hustle.

    Good news: You don’t need to be a pro designer. Start small, learn as you go, and level up with repeatable systems.

    Why LEGO MOC Building Is Perfect for a Side Hustle

    LEGO fans are constantly searching for unique builds, clear instructions, parts lists they can shop on BrickLink, and custom MOCs based on favorite themes. This steady demand means skilled builders—and anyone willing to learn—have a genuine opportunity.

    • Unique, display‑worthy designs
    • Easy‑to‑read instructions with subassemblies
    • BrickLink‑friendly parts lists and substitutions
    • Theme‑based packs and seasonal models

    Ways to Turn MOCs Into Income

    1) Sell Digital Building Instructions

    List on marketplaces like Rebrickable or Etsy, or sell directly on your site. Package printable PDFs plus a parts inventory for best results.

    Use our LEGO1 generators to produce structured build plans, variants, Buildability Scores, and recommended substitutions—so your docs look professional and sell better.

    2) Offer Custom Commissions

    Design one‑of‑a‑kind builds—cars, pets, landmarks, game characters. Our generators help you deliver quick concept snapshots, color recipes, and draft parts lists you can refine into a polished model.

    3) Make Instruction Bundles or Build Packs

    Bundles convert well: micro‑cars, tabletop décor, holiday sets. The generators help you brainstorm themes and output subassemblies, shopping lists, and display suggestions.

    4) Grow with YouTube & Social Media

    Share speed‑builds, “how I document a MOC,” or top substitution tips. Link to your instructions, build an audience, and add a revenue stream.

    5) Teach Workshops—Online or Local

    Run library classes, school sessions, or birthday mini‑builds. Generate beginner‑friendly models and printable guides in minutes.

    6) Build Displays for Events

    Hobby shops and local businesses commission seasonal dioramas. Our Diorama Pack support helps you organize modules and provide assembly notes.

    How Our LEGO1 Generators Help You Work Faster

    • Clear, BrickLink‑friendly parts lists
    • Step‑by‑step build notes with subassemblies
    • Real‑part substitution tables and color recipes
    • Buildability Score and MOC labeling
    • Four output levels: snapshot → full plans

    A Simple Growth Roadmap

    Beginner

    • Create 1–3 original MOCs
    • Generate instructions with LEGO1
    • List on Etsy or Rebrickable

    Growth

    • Develop a recognizable style & brand
    • Release themed bundles
    • Launch a simple website & post regularly

    Pro

    • Offer commissions and workshops
    • Sell physical kits or premium packs
    • Partner with local shops & conventions

    How Much Can You Earn?

    • $50–$250 per custom commission
    • $5–$30 per instruction download
    • $100–$1,000 for event/display builds

    Creators with consistent publishing and a strong audience can build meaningful recurring income over time.

    Final Thoughts

    Anyone passionate about LEGO MOC building can turn it into a side hustle. You don’t need fancy gear—just imagination, consistency, and a repeatable process. Our LEGO1 generators help you design faster, document better, and sell confidently.

    Start small. Build what excites you. Share it. Your side hustle could begin with your next brick.


    LEGO® is a trademark of the LEGO Group, which does not sponsor, authorize or endorse this site. Some rendered images may show colors or finishes that are not currently produced by LEGO; substitution notes are provided for real‑world building.
    Banner: LEGO Side Hustle (TacoCat in Texas)
  • Paint LEGO bricks for custom MOCs,

    Painting LEGO® Bricks — A Practical Guide for Generator Users

    You can paint LEGO® bricks for custom MOCs, props, and display builds. This guide is written for our generator users who want real-world finishes that look great without wrecking clutch. Below you’ll find the best paint brands for ABS, a safe step-by-step workflow (clean → mask → prime → paint → seal), and techniques for weathering and chrome. Every internal link below jumps to a section on this page, and the copy buttons let you paste quick checklists into your build notes.

    Painting LEGO bricks banner

    Painting LEGO® Bricks — Do It Right, Keep Your Clutch

    Best brands, step-by-step, weathering, and chrome—tailored for generator users and real-world builds.

    Quick Verdict & Cautions

    Yes, you can paint LEGO bricks for MOCs, props, displays, stop-motion, and cosplay. It’s common in the scale-model world and works on ABS with care.

    Green light: Display pieces, unique colors/finishes, weathering, small accents.
    • Painted bricks are modified and lose collector value.
    • Paint can chip on friction points and slightly change clutch if applied to studs/tubes.
    • Prefer water-based acrylics; avoid “hot” solvents on bare ABS.
    Pro tip: Never coat connection surfaces (studs, tubes, axle holes, hinge faces). Mask them.
    ↑ Back to top

    Best Paint Brands (by use case)

    These are popular with miniature and scale-model builders and work well on ABS when applied in light coats and properly cured.

    Use CaseRecommended BrandsNotes
    Brush & Hand-detail Acrylics Vallejo Model/Mecha/Game Color, Citadel Colour, The Army Painter, AK 3rd Gen Water-based, low odor, excellent color range; seal afterwards.
    Airbrush Color Coats Vallejo Model Air/Mecha Color, Tamiya (X/XF with thinner), Mission Models Thin, multiple light passes; smooth, even finish.
    Primers (gentle on ABS) Vallejo Surface Primer, Badger Stynylrez (airbrushable) Water-borne polyurethane; bonds without attacking plastic.
    Clear Coats / Varnish Vallejo Polyurethane Varnish (Matte/Satin/Gloss), AK Ultra Matte Protects finish; avoid build-up on connection geometry.
    Weathering Products AK Interactive, Ammo by MIG, Tamiya Panel Line, Vallejo Pigments Washes, streaking, grime, pigments for convincing wear.
    Chrome / Mirror (quick) Molotow Liquid Chrome marker High-shine accents; handle minimally, seal with care.
    Chrome / Mirror (airbrush) Alclad II Chrome, Spaz Stix Mirror Chrome Over a flawless gloss black base; test on scrap first.
    Vinyl-style dye sprays* SEM Color Coat, VHT Vinyl Dye Can “soak” into some plastics (varies on ABS). Always test.
    ↑ Back to top

    ✅ Step-by-Step: Clean → Mask → Prime → Paint → Seal

    1. 1 Plan the finish — decide cosmetic vs functional parts. Do not paint studs, tubes, axle holes, bars, clips, hinge faces, or gear teeth.
    2. 2 Wash — warm water + a drop of dish soap. Rinse and dry fully.
    3. 3 Mask connection geometry — low-tack tape or liquid mask on studs/tubes. Hole-punch makes perfect stud circles.
    4. 4 Optional scuff — very light gray Scotch-Brite on glossy parts. Avoid edges; wipe dust.
    5. 5 Prime (thin) — water-borne primer (Vallejo/Stynylrez). Two mist coats, 10–15 mins apart.
    6. 6 Color coats — brush: multiple thin layers. Airbrush: 15–25 psi, light passes, rotate parts.
    7. 7 Detailing — stripes/insignia via fine brush or vinyl decals.
    8. 8 Weather (optional) — see the next section; seal between stages.
    9. 9 Seal — matte/satin/gloss varnish in two light coats; keep clear off studs/tubes.
    10. 10 Cure — allow 24–48 hours before handling or assembly.
    Avoid: Heavy rattle-can coats, enamel/lacquer flooding, and any build-up on functional contact areas—the #1 reason clutch gets ruined.
    ↑ Back to top

    ✅ How to Weather LEGO Bricks (Realistic Wear & Grime)

    1) Panel line & washes

    • Use pre-mixed panel line (Tamiya) or make a wash (1 part acrylic : 8–10 parts water/medium).
    • Flow into seams and recesses; let capillary action work. Clean excess with a damp swab.

    2) Dry-brushing

    • Load a stiff brush, wipe almost dry, then skim edges to pop highlights and worn corners.

    3) Sponge chipping

    • Dab a torn foam bit in dark “chip” color, tap off, then gently touch high-wear zones.
    • Add a tiny bright edge inside big chips to suggest exposed “metal.”

    4) Streaks, soot & rust

    • Streaking enamels/oils (AK/MIG) over a sealed acrylic base; pull downward with a soft brush.
    • Pastel pigments for dust/soot; fix with pigment fixer or a very light varnish mist.
    ↑ Back to top

    ✅ Chrome & Mirror Finishes

    Fast & simple (markers)

    • Molotow Liquid Chrome (1–4 mm tips) for trims and small parts.
    • Let cure several hours; avoid touching—fingerprints dull the mirror.
    • Sealing can slightly reduce mirror—test a spare piece first.

    Airbrush mirror systems

    • Alclad II Chrome or Spaz Stix Mirror Chrome over a flawless gloss black base.
    • Ultra-light passes at low pressure; stop when the mirror “pops.”
    • Use a spray booth/respirator and test on scrap bricks first.

    Non-paint options: Chrome vinyl micro-wraps for flat facets, third-party chrome elements, or professional vacuum-metallization for showpieces.

    ↑ Back to top

    FAQ & Troubleshooting

    Will paint ruin clutch?

    Only if it builds up on studs, tubes, or friction faces. Mask these areas and keep coats thin.

    My paint chips—what now?

    Add a protective clear coat and allow full cure time. Avoid handling edges; assemble after 24–48 hours.

    Which parts should I never paint?

    Studs, tubes, hinge knuckles, technic pin holes, axle bores, bars/clips, gear teeth, and any sliding or rotating surfaces.

    Primer necessary?

    Highly recommended for durability and even coverage—use water-borne primers that bond without biting into ABS.

    ↑ Back to top

    Safety & LEGO-Fit Notes

    • Ventilation: Spray/solvent products require a respirator and airflow. Prefer water-based products when possible.
    • Thin is win: Several mist coats beat one heavy coat every time.
    • Test first: Keep a handful of “sacrifice” bricks for experiments.
    • Collector value: Painted bricks are modified parts—don’t paint rare pieces unless you accept depreciation.
    ↑ Back to top

    Quick Reference Cards

    Best-in-Class Shortlist

    Primer: Vallejo / Stynylrez Airbrush: Vallejo Air Brush: Vallejo / Citadel Weather: AK / MIG Chrome: Molotow / Alclad

    Do / Don’t

    • ✅ Clean, mask, thin coats, cure fully
    • ✅ Keep paint off connection geometry
    • ❌ Heavy rattle-can floods or hot lacquers on bare ABS
    • ❌ Painting studs/tubes/axle holes/hinges
    ↑ Back to top

    For Generator Users

    Use this finish guide after you finalize your model in the generator. Keep functional geometry paint-free to preserve clutch, and prefer water-based products for safer, controllable coats. If your plan calls for heavy handling or play, consider color-matched parts via BrickLink first, then reserve paint for accents, weathering, and chrome details.

    LEGO® is a trademark of the LEGO Group, which does not sponsor or endorse this guide. This article is for hobby customization. Some finishes (mirror chrome, metallics) may appear in photos more vivid than in person; substitution notes are recommended for real-world building.

    © Lego Fan Plans. All rights reserved. · Return to top

  • The Art of Lego Block Scale Model Hacking

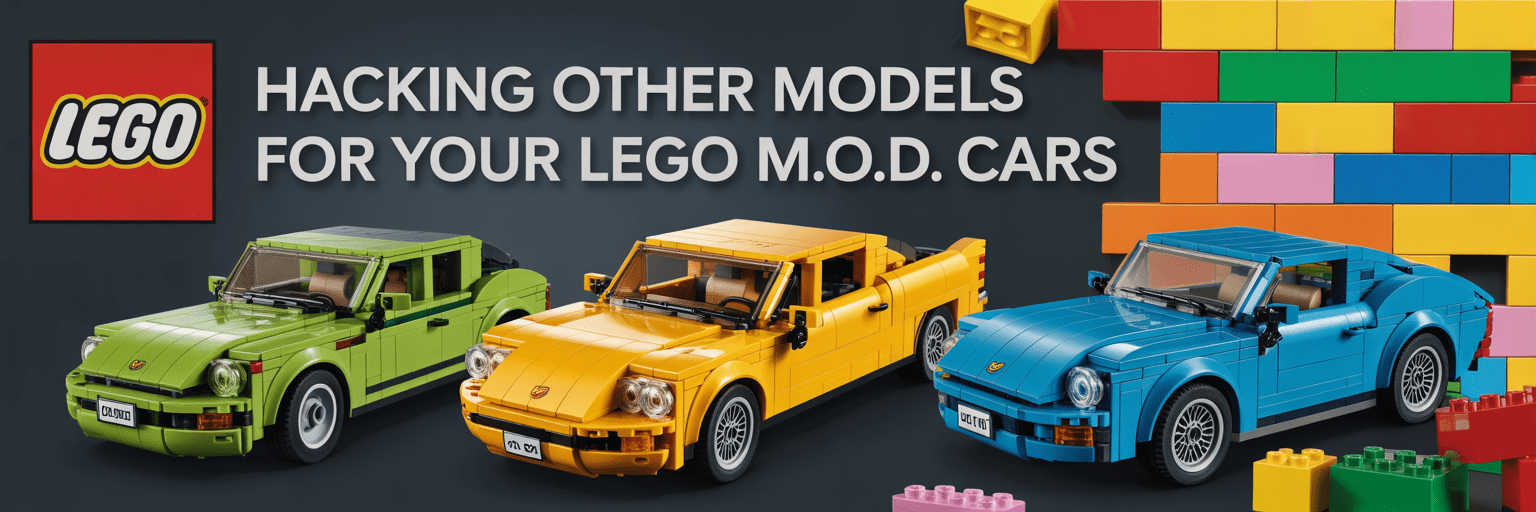
    Hacking other models for your Lego M.O.D. cars

    Breathing New Life Into Your LEGO Classic Car Builds: The Ultimate Parts Hacking Guide
    LEGO parts hacking banner

    Breathing New Life Into Your LEGO Classic Car Builds: The Ultimate Parts Hacking Guide

    Originally by Clark2368 — Expanded and Enhanced

    Introduction: Beyond the Plastic

    Building a classic car with LEGO can be a rewarding experience, but sometimes you want that extra touch of realism that standard LEGO pieces just can’t provide. This is especially true when it comes to chrome details that can truly make a vintage automobile pop. If you’ve been frustrated by LEGO’s decision to discontinue their chrome pieces and blocks, don’t worry—there’s a whole world of alternative parts waiting to be discovered and integrated into your builds.

    The Chrome Dilemma: Why Standard LEGO Falls Short

    Let’s face it: nothing says “classic car” quite like gleaming chrome bumpers, grilles, and trim. Unfortunately, LEGO has phased out their chrome elements, leaving builders with limited options for achieving that authentic metallic shine. While silver-colored pieces can work in a pinch, they simply don’t catch the light with the same brilliance as true chrome.

    The closest current LEGO alternatives include:

    • Metallic silver pieces (flat appearance, lacks the mirror-like quality of chrome)
    • Light bluish gray pieces (even less reflective)
    • Chrome-colored stickers (prone to peeling and unrealistic texture)

    The Art of Parts Harvesting: “Kit-Bashing” 101

    This is where the art of “kit-bashing” comes in—the practice of borrowing parts from different model kits to create something unique. This technique has been used for decades by professional model makers and Hollywood prop designers, and now it’s becoming increasingly popular in the LEGO community.

    Prime Hunting Grounds for Alternative Parts

    1. Thrift Stores & Secondhand Shops

    • Goodwill, Salvation Army, St. Vincent de Paul: Regular visits can yield surprising finds
    • Independent thrift stores: Often have less picked-over inventory
    • Flea markets & garage sales: Can offer model kits for pennies on the dollar
    • Estate sales: Particularly good for finding vintage model kits with higher quality chrome parts

    2. Online Sources

    • eBay: Search for “model car parts lot” or “model kit junk box”
    • Facebook Marketplace: Local pickups can save on shipping costs
    • Hobby forums: Many modelers sell surplus parts or “parts cars”
    • r/modelmakers on Reddit: Members often trade or sell spare parts

    3. Hobby Shops

    • Clearance bins: Look for damaged kits sold at steep discounts
    • Parts boxes: Some shops have bins of loose parts from returns or display models

    What to Look For: The Parts Treasure Hunt

    1. Plastic Model Car Kits

    • Chrome-plated sprues: These contain bumpers, grilles, and trim pieces
    • Vintage kits (1970s–1990s): Often have thicker chrome plating than modern kits
    • 1:25 scale: Closely matches LEGO minifigure-scale vehicles
    • 1:24 scale: Slightly larger but still usable for many LEGO builds
    • Manufacturers to seek: Revell, AMT, Monogram, Tamiya, and Hasegawa kits typically have high-quality chrome parts

    2. Die-cast Vehicles

    • Maisto, Hot Wheels premium lines, and M2 Machines: Feature separable plastic chrome elements
    • “Parts cars”: Damaged die-casts sold cheaply
    • Dollar store vehicles: Sometimes have usable chrome plastic components
    • Matchbox Premiere Collection: Known for detailed chrome trim pieces

    3. Specialty Parts

    • Old toy vehicles (’80s/’90s): Chrome-plated plastic parts to harvest
    • Costume jewelry: Shiny beads or broken components for chrome-like accents
    • Holiday decorations: Chrome plastic ornaments can be repurposed
    • Chrome model aircraft landing gear: Perfect for custom exhaust pipes

    Tools of the Trade: Equipment for Parts Adaptation

    • Precision cutting tools: X-Acto knives, sprue cutters, and fine-toothed saws
    • Micro files: For smoothing cut edges and shaping parts
    • Pin vise and micro drill bits: Creating connection points in non-LEGO parts
    • Small pliers and tweezers: For precise handling of tiny components
    • Adhesives: Clear-drying plastic cement, E6000, and poster putty for temporary mounting
    • Plastic styrene sheets: For creating adapter pieces
    • Magnifying headset: For detail work
    • Digital calipers: For precise measurement of LEGO connection points

    Integration Techniques: Making Non-LEGO Parts Work

    1. Non-Permanent Methods

    • Poster putty/Blue-Tack: Allows for easy removal and repositioning
    • Micro magnets: Embed in LEGO pieces for magnetic attachment
    • Hidden friction fits: Sizing non-LEGO parts to press-fit into LEGO recesses
    • Clip systems: Using LEGO clips and bars to hold custom parts

    2. Semi-Permanent Solutions

    • Strategic placement: Position parts where they’re held by surrounding LEGO elements
    • Complementary sizing: Match parts to LEGO minifigure-scale proportions
    • Custom SNOT techniques: (Studs Not On Top) to create attachment points facing multiple directions
    • Brick-built housing: Create LEGO “sockets” that non-LEGO parts can slot into

    3. Permanent Modifications (For the Committed Builder)

    • Drilling and pinning: Creating connection points in non-LEGO parts
    • Custom mounting solutions: Hidden LEGO attachment points for stability
    • 3D printed adapters: Custom-designed interface pieces
    • Precision cutting: Trimming model kit parts to fit LEGO dimensions exactly

    Beyond Chrome: Other Enhancement Possibilities

    • Detailed engine components: Carburetors, air cleaners, and valve covers from model kits
    • Realistic tire options: Model kit tires with authentic tread patterns
    • Clear plastic parts: For improved windows, headlights, and taillights
    • Interior details: Steering wheels, dashboards, and seats with realistic textures
    • Specialty decals and insignias: For accurate brand markings and period-correct details
    • Weathering supplies: For creating realistic rust, dirt, and wear effects
    • Fabric convertible tops: From model kits or crafting supplies

    Practical Applications: Case Studies

    Example 1: ’57 Chevy Bel Air Project

    • Challenge: Creating authentic chrome bumpers and grille
    • Solution: Harvested front bumper and grille from a damaged 1:25 AMT kit
    • Integration: Mounted using hidden LEGO Technic pins drilled into the model parts
    • Result: Show-quality chrome details that catch light realistically

    Example 2: VW Microbus with Chrome Trim

    • Challenge: Accurate window trim and VW emblems
    • Solution: Used chrome sprue from a Revell kit, carefully cut and shaped
    • Integration: Applied with tiny amounts of E6000 adhesive
    • Result: Realistic trim that frames windows authentically

    Example 3: Hot Rod with Custom Headers

    • Challenge: Creating realistic exhaust headers and pipes
    • Solution: Chrome parts from model aircraft landing gear
    • Integration: Modified to fit using heat-bending and LEGO Technic connectors
    • Result: Eye-catching exhaust system with authentic metallic finish

    The Digital Dimension: Online Resources

    • Flickr groups: “LEGO MOC Cars” and “LEGO Modding Community”
    • Reddit: r/AFOL (Adult Fans of LEGO) and r/legomodifications
    • YouTube channels: Beyond the Brick, Brick Bending, and custom LEGO car builders
    • Bricklink forums: Discussion boards for advanced building techniques
    • Facebook groups: “LEGO Car Builders” and “Custom LEGO Vehicles”

    Preservation and Maintenance

    • Dust protection: Display cases or regular gentle dusting with photography blower brushes
    • Handling considerations: Wear cotton gloves when handling to prevent fingerprints
    • UV protection: Keep displayed models away from direct sunlight to prevent chrome deterioration
    • Cleaning methods: Microfiber cloths and mild glass cleaner (on the cloth, never directly on parts)
    • Documentation: Photograph and document your modifications for future reference or sharing

    The Ethical Angle: Sustainable Building

    Good for your builds—and the planet. By rescuing and repurposing parts from incomplete or unwanted kits, you’re extending useful life, reducing waste, supporting thrift stores, and creating unique, unreplicable builds.

    Advanced Techniques: For the Dedicated Builder

    • Chrome restoration: Mild metal polish can revitalize dulled chrome parts
    • Custom chrome plating: Spray-on chrome alternatives like Spaz Stix Mirror Chrome
    • Vacuum-forming: Creating custom parts using thin plastic sheets
    • Molding and casting: Making silicone molds of desirable parts to produce duplicates
    • LED integration: Adding lighting effects to complement chrome details

    Community Connection: Sharing Your Techniques

    • Document builds and modifications with detailed photos
    • Create step-by-step guides for specific techniques
    • Participate in LEGO fan events and display your custom creations
    • Mentor younger builders in the art of creative parts usage
    • Organize parts-exchange meetups with other builders

    Conclusion: Breaking Boundaries

    The beauty of LEGO has always been its flexibility and the creativity it inspires. By expanding your parts inventory beyond official LEGO elements, you’re participating in a long tradition of customization and personalization that makes the hobby so rewarding.

    So next time you’re passing a thrift store or garage sale, take a moment to look for potential donor kits. That perfect chrome bumper for your LEGO ’57 Chevy might be waiting inside an otherwise unremarkable box on a dusty shelf, just waiting to give your build that extra touch of authenticity that will make fellow enthusiasts do a double-take.

    Happy building—and happy hunting!

    This expanded guide builds upon the original work by Clark2368, with additional research, techniques, and community insights compiled for the benefit of the LEGO custom car building community.
    ↑ Top

  • Lego Fans People Cartoon Strip Generator

    LEGO Comic — Image Prompt Builder

    LEGO Comic — Image Prompt Builder

    This page turns your custom generator data into a single, SEO‑ready image prompt for a multi‑panel LEGO comic. It builds layout, story, and visual instructions so image models render consistent minifigs, sets, and scenes.

    Which text to paste here? For the best results, copy the first 5 lines of your final LEGO Fan Plans prompt (or the top 10 lines after you create your Fan Plans) and paste it into the fields below. This simple step helps keep your comic settings accurate, improves SEO, and makes your instructions easy for 8th-grade readers to understand.

    How to keep going in your image bot: You can continue this comic in any AI image bot. Paste the image prompt you made here, then add the provided continuation line near the buttons below.

    Tips: it’s best to start with no speech bubbles or blank bubbles. Keep text easy to read (about 12pt).

    Copy-Ready Image Prompt

  • “K – 7th grade World Language Speaking Drills.”

    K – 7th grade World Language Speaking Drills

    K – 7th grade World Language Speaking Drills

    Choose options below, then click Make Prompt. Copy or Reset just like the reference generator.

    Setup — Select Your Options

    Tip: For Novice levels, keep utterances short, recycle high-frequency language, and provide sentence frames/visuals.

    Your Assembled Prompt

    The generated prompt instructs an AI to draft a concise lesson sequence, cue cards, and a simple rubric aligned to your selections.

  • Aquarium Cleaning Business Start Up Forms prompt Generator

    Aquarium Cleaning Business Start Up Forms prompt Generator

    Aquarium Cleaning Business Start Up Forms prompt Generator

    Choose options below, then click Make Prompt. Copy or Reset just like the reference generator.

    Setup — Select Your Options

    Tip: “Standard clean + 10–20% water change” fits many tanks; reef systems usually include salinity/alkalinity/calcium checks.

    Your Assembled Prompt

    The generated prompt tells an AI to draft editable startup forms (DOCX + fillable PDF) and a one-page client checklist using your choices.

  • 25 AI Commands to Instantly Improve Your Lego Fan Plans

    25 AI Commands to Instantly Improve Your Lego Fan Plans

    Getting Started

    1) Starter Brief

    Quick plan summarizing the build and constraints.

    — click Reveal to view —

    2) Real-Build Mode

    Remove fantasy parts and enforce real techniques.

    — click Reveal to view —

    3) Size & Scale

    Lock the model to a target footprint or scale.

    — click Reveal to view —

    4) Color Policy

    Define color constraints and substitutions.

    — click Reveal to view —

    5) Constraint Recap

    Make sure nothing important got lost.

    — click Reveal to view —

    6) Assumptions Audit

    Uncover hidden defaults.

    — click Reveal to view —

    7) Scope Guardrails

    Prevent scope creep.

    — click Reveal to view —

    8) Timeboxing

    Plan around real deadlines.

    — click Reveal to view —

    9) Accessibility Mode

    Make instructions easier to follow.

    — click Reveal to view —

    Parts & Inventory

    10) BrickLink Parts List

    Get a complete, purchasable bill of materials.

    — click Reveal to view —

    11) Cost Optimization

    Lower price and prefer common parts.

    — click Reveal to view —

    12) Swap Rare Parts

    Replace hard-to-find items with equivalents.

    — click Reveal to view —

    13) Use My Inventory

    Tailor the plan to what you own.

    — click Reveal to view —

    14) Color Conflict Report

    Catch unavailable color choices.

    — click Reveal to view —

    15) Cost & Weight Estimate

    Know the budget and physical heft.

    — click Reveal to view —

    16) Region Availability Filter

    Buyable where you live.

    — click Reveal to view —

    17) Part Category Caps

    Keep the mix simple.

    — click Reveal to view —

    18) Environmental Constraints

    Heat, humidity, handling.

    — click Reveal to view —

    19) Spare Parts Plan

    Order a little extra, smartly.

    — click Reveal to view —

    20) Palette Lock

    Stay on-brand.

    — click Reveal to view —

    Build Planning

    21) Step-by-Step Guide

    Procedural instructions with checkpoints.

    — click Reveal to view —

    22) Stability Plan

    Reinforce the internal core.

    — click Reveal to view —

    23) Technique Request (SNOT, etc.)

    Style-specific instructions.

    — click Reveal to view —

    24) Technic Integration

    Axles, pins, gearing where needed.

    — click Reveal to view —

    25) Display Base / Stand

    Make it shelf-ready.

    — click Reveal to view —

    26) Submodel Map

    Divide and conquer.

    — click Reveal to view —

    27) Alternate Technique Plan

    Options to choose from.

    — click Reveal to view —

    28) Tooling Preference

    Match your software.

    — click Reveal to view —

    29) Photography Plan

    Make it look pro.

    — click Reveal to view —

    30) Packaging Mockup

    Box art concept.

    — click Reveal to view —

    Mockups & Visuals

    31) Final Build Mockup

    Multi-view end-of-build render.

    — click Reveal to view —

    32) Photo-Ready Parts Layout

    Neat grid for social posts.

    — click Reveal to view —

    33) Sticker-Free Look

    Pure brick aesthetics.

    — click Reveal to view —

    34) Kid-Friendly Mode

    Fewer steps, faster build.

    — click Reveal to view —

    35) Microscale Variant

    Under 100 parts challenge.

    — click Reveal to view —

    36) View Set Generator

    Consistent angles every time.

    — click Reveal to view —

    37) Texture Simplifier

    Cleaner surfaces.

    — click Reveal to view —

    38) Stress Test

    Spot likely failure points.

    — click Reveal to view —

    39) Instruction QA

    Proofread the build steps.

    — click Reveal to view —

    40) Parts Sanity Check

    Numbers that add up.

    — click Reveal to view —

    Quality & Troubleshooting

    41) Illegal Connection Check

    Catch issues before you buy parts.

    — click Reveal to view —

    42) Error Recovery

    Resume cleanly after a mis-step.

    — click Reveal to view —

    43) Progress Snapshot

    Save a checkpoint version.

    — click Reveal to view —

    44) Parts Diff

    Track changes clearly.

    — click Reveal to view —

    45) Build Time Estimate

    Plan your weekend.

    — click Reveal to view —

    46) Recolor Variant

    Try a new scheme fast.

    — click Reveal to view —

    47) Instruction Snippet Export

    Share a teaser.

    — click Reveal to view —

    48) License & Attribution

    Share responsibly.

    — click Reveal to view —

    Export & Sharing

    49) Export Packs

    All the files you need.

    — click Reveal to view —

    50) MOC Press Release

    Share your build like a pro.

    — click Reveal to view —

    51) Social Pack

    Ready to post.

    — click Reveal to view —

    52) Store Cart XML

    Fast checkout.

    — click Reveal to view —

    53) BOM by Submodel

    Stage your orders.

    — click Reveal to view —

    54) Instruction Localization

    Reach more builders.

    — click Reveal to view —

    55) Reproducibility Checklist

    Make outputs consistent across bots.

    — click Reveal to view —
  • Lego Fan Plans Famous Dinosaurs

    LEGO1 — Famous Dinosaur Skeletons From Around The World (Simplex Generator)

    Level 1 — Snapshot


    Level 2 — Builder Brief


    Level 3 — Detailed Prompt


    Level 4 — Press‑Release


    Included Specimen Data (for accuracy)

    Curated highlights used to guide proportions and label text:

    • SUE (FMNH PR 2081) — ~40 ft (12.3 m) long, ~13 ft hip height; ~90% complete.
    • STAN — nearly complete T. rex; to be displayed at Natural History Museum Abu Dhabi.
    • Tristan Otto — original T. rex in Europe; ~12 m long, ~4 m tall mount.
    • Horridus — world‑class complete Triceratops horridus at Melbourne Museum.
    • Dippy — iconic Diplodocus carnegii cast, NHM London (replica lineage).
    • Apatosaurus louisae — classic Carnegie mount (with historic head correction).
    • Giraffatitan (Brachiosaurus) — tallest mounted dinosaur (~13.27 m) in Berlin.
    • Apex — remarkably complete Stegosaurus at AMNH (current display).
    • Máximo — Field Museum Patagotitan cast spanning 122 ft.

    This page is a standalone, WordPress‑safe generator. No external scripts, no inline event handlers.

  • Lego Fan Plans Vintage Vehicle Showcase

    Vintage Car LEGO Build Guides | Lego Fan Plans

    🚘 Lego Fan Plans — Vintage Vehicle Showcase

    Browse museum-grade LEGO® builds with BrickLink parts lists and real-build notes. Use the filters below to jump to what you like.

    🏁 Grand Prix & Racing

    🛻 Trucks & Utility

    🫶 Micro & Compact

    🎩 Coachbuilt & Luxury

    🏎️ GT & Sports Cars

  • 1937 Cadillac Series 75 Tour Bus

    1937 Cadillac Series 75 Tour Bus — LEGO1 Simplex Generator
    LEGO1 Simplex Generator

    1937 Cadillac Series 75 Tour Bus

    Museum‑quality LEGO clone • three sizes • lift‑off top • full interior • official parts only

    Build Controls

    Two columns, one scroll. Choose settings in these four boxes, then click Generate.

    Select sizes (3 outputs)
    All three are selected by default to produce parallel, scale‑tuned plans.

    Palette will be mapped to current LEGO element colors with BrickLink availability notes.

    If left empty, prompts will instruct the model to research authoritative sources on the 1937 Cadillac Series 75 tour bus conversions.

    Real‑Build Mode: ON Official LEGO elements only. No fantasy parts. Emphasize BrickLink inventory and legal techniques.
    How to read these plans Copy tools

    Level 1 — Snapshot

    Level 2 — Builder Brief

    Level 3 — Detailed Prompt

    Level 4 — Press‑Release