Category: Lego Fan Plans

  • Auburn 852 Boattail Speedster (1936)

    Auburn 852 Boattail Speedster (1936) — LEGO Simplex Generator
    LEGO1 Simplex Generator

    Auburn 852 Boattail Speedster (1936)

    Museum‑quality LEGO clone • three sizes • full interior • official parts only

    Build Controls

    Use the four boxes below (2×2 layout). Each control uses dropdowns so you can lock choices. Hit Generate when ready.

    Select sizes (3 outputs)
    All three are enabled by default to create parallel instructions tuned per scale.

    Palette will be translated to current LEGO element colors with BrickLink availability notes.

    If left empty, prompts will still instruct the model to research verified references of the Auburn 852 Boattail Speedster (1936).

    Real‑Build Mode: ON Official LEGO elements only. No fantasy parts. Emphasize BrickLink inventory sourcing and legal techniques.
    How to read these plans Real‑Build Mode

    Level 1 — Snapshot

    Level 2 — Builder Brief

    Level 3 — Detailed Prompt

    Level 4 — Press‑Release

  • 1916 Simplex Crane Model 5 Touring Car

    1916 Simplex Crane Model 5 Touring Car

    Create builder-ready prompts, BOMs, and a stepwise instruction outline for a historically styled 1916 Simplex touring car model.

    Level 1 — Snapshot

    (Press Generate)

    Level 2 — Builder Brief

    (Press Generate)

    Level 3 — Detailed Prompt

    (Press Generate)

    Level 4 — Press Release / PR Brief

    (Press Generate)

    Build Summary

    Buildability Score:
    Bill of Materials (summary):
      Stepwise Build Guidance (high level):
        Stability & handling notes:

        Display / pose suggestions:

        Instruction Manual (excerpt):
        Final mockup preview info: 45° front-left isometric, soft gray background; export-ready images and instruction panels available in Visual Manual Mode.
      1. How to Read the Plans Our Generators Produce

        Simple Guide

        How to Use Our LEGO® Plans (Explained for Kids & Grown‑ups)

        These plans are real and buildable with real LEGO parts. We keep the steps clear, the pieces common, and the builds sturdy. If you can sort bricks, you can follow this.

        What the Four Boxes Mean

        📸 Level 1: Snapshot

        One short paragraph that tells you what you will build and about how big it is. Think of it like the picture on the box.

        🧰 Level 2: Builder Brief

        Quick facts: size on the table, how tricky it is, and any special notes. Good for getting ready.

        📐 Level 3: Detailed Plan

        Step‑by‑step modules (big chunks) and sub‑assemblies (small chunks). Do one chunk at a time—nice and calm.

        📰 Level 4: Share Text

        A friendly description you can post to show what you made. Optional, but fun.

        Fast Way to Read the Plan

        1
        Read the Snapshot to make sure it’s the thing you want to build.
        2
        Check the Brief for table space, difficulty, and any special parts.
        3
        Follow the Detailed Plan one module at a time. Do the quick checks after each module.
        4
        Use the Share Text if you want to show your build online.

        Are These Plans Really Real?

        Yes. Here’s how we make sure:

        • Real parts only: We stick to common LEGO elements (bricks, plates, tiles, Technic pins, hinges). No fantasy parts.
        • Smart structure: Layers overlap to lock together. Long plates bridge seams. Weak spots get extra support.
        • Stability checks: After each module you’ll see quick tests: squeeze gently, check wobble, make sure pins are fully in.
        • Clear names: Part groups are labeled (for example: “2×4 bricks”, “1×2 plates”, “Technic pin”). Easy to count, easy to find.
        • Color‑safe: Colors are flexible unless we mark them “structural.” You can swap to what you have.
        • Reality first: We avoid illegal connections and angles that stress parts.

        Parts List (BOM) — Simple Example

        Use this to gather pieces. Start with one module so your table stays tidy.

        Bricks & Plates — strong core
        • 2×4 bricks × 40
        • 2×2 bricks × 28
        • 1×4 plates × 24
        
        Connections & Support
        • Technic pins × 18
        • 2×2 corner plates × 10
        
        Details
        • 1×1 tiles × 30
        • Curved slopes × 12
            

        Tip: Put each module’s parts in its own little tray or bowl.

        Modules, Sub‑Assemblies & Quick Checks

        • ✅ Stability: squeeze corners—no wobble.
        • ⚠️ Alignment: studs line up; left and right match.
        • ✅ Connections: pins and hinges fully clicked.

        Catching a loose bit early saves time later.

        How the Pictures & Notes Help You

        • Top view shows the footprint and symmetry.
        • Isometric notes show how layers stack up.
        • Side notes warn about hinge limits and offsets.

        If Something Feels Off

        Colors don’t match mine

        That’s okay! Swap to close colors (light/dark gray families work great). Only keep colors the same if we say they’re structural.

        The build twists a little

        Add a plate layer across the joint or use a longer plate to bridge seams. Technic pins across a joint also help.

        A hinge won’t bend that far

        Check for tiles bumping into something. Move the hinge out by one stud or use a shorter span.

        Quick Questions

        What is “Real‑Build Mode”?

        It means the plan uses normal, buyable LEGO parts and safe, repeatable techniques. No pretend pieces.

        Do I have to copy the exact colors?

        No. Colors are for style unless we mark them structural. Use what you have and keep strong parts strong.

        Are these plans for beginners?

        Yes! Difficulty is marked. Start with “Easy,” go slow, and build one module at a time.

        TL;DR: These are real, sturdy plans with real parts. Read the Snapshot, prep with the Brief, build the modules, do the checks, and enjoy!

      2. MOD U: Color Blocking & Contrast for Mini-MODs

        MOD U lesson banner

        Why Color Blocking Matters (Especially for Mini-MODs)

        Mini builds live or die by readability. With fewer studs to communicate form, your color choices must do extra work: separate planes, guide the eye, and frame a point of interest. This lesson gives you a simple system to make any small build “read” instantly—even at phone-thumbnail size.

        The Three Rules

        1. Limit the palette (3+1): two mains, one neutral, one accent.
        2. Separate by value: keep light vs. dark on adjacent planes.
        3. One accent, one job: use it to point at the focal detail (sign, canopy stripe, flower, logo).

        Starter Palettes You Already Own

        • City Pop: Bright Light Blue (main), White (main), Light Bluish Gray (neutral), Yellow (accent)
        • Industrial: Dark Bluish Gray (main), Light Bluish Gray (main), Black (neutral), Trans-Light Blue (accent)
        • Desert Tan: Tan (main), Dark Tan (main), Reddish Brown (neutral), Dark Red (accent)
        • Forest: Dark Green (main), Olive (main), Dark Bluish Gray (neutral), Bright Light Orange (accent)

        Tip: If you don’t have the exact color, substitute by value (light vs. dark) instead of hue.

        60-Minute Build-Along: From Gray Blob to Readable Mini

        Goal: 12×12 base (or smaller), a micro-scene with one focal object (kiosk, food cart, lifeguard chair, robot).
        Constraint: Use the 3+1 palette and keep accent pieces under 5% of total parts.

        1. Sketch in 3 shapes (5 min): base, main form, topper using only your two mains. No accent yet.
        2. Assign values (5 min): choose which block is light and which is dark; swap one for neutral if needed.
        3. Edge readability (8 min): add SNOT tiles/plates to make clean light/dark borders (roofline, chassis, sign).
        4. Focal point (6 min): pick ONE location for the accent (stripe, eye, frame). Add it and stop.
        5. Secondary details (10 min): add 2–3 micro details using mains + neutral only; keep them quiet.
        6. Grounding (6 min): neutral base; use darker main to “shadow” under overhangs.
        7. Read test (5 min): arm’s-length or 150px-tall phone view. If unclear, increase value split or reduce accent.
        8. Lock-in (5 min): secure connections; color-correct hidden internals; ensure display stability.

        Common Color Pitfalls (and Fast Fixes)

        • Muddy middle: mains too similar in value → lighten one plane or tile the lighter plane.
        • Accent sprawl: accent shows up everywhere → remove all but one cluster/line.
        • No focal path: eye drifts → create a light-to-dark “ladder” aimed at the accent.

        Part Re-use Moves that Boost Readability

        • Inverted tiles as borders: 2×2 tiles on headlight bricks for razor-edge stripes.
        • Bracket picture frames: 1×2–2×2 brackets to frame signage with a one-plate recess (shadow = value contrast).
        • Grille tiles as shading: run grilles on the dark side to deepen perceived value without changing color.

        Quick Photo Setup for Color Truth

        • Background: plain white or mid-gray card.
        • Lighting: two desk lamps at 45°, diffused with printer paper.
        • White balance: set to “Daylight.”
        • Thumbnail test: export a 1:1 crop at ~600 px; check read at 25% zoom.

        At-a-Glance Checklist (Copy/Paste)

        • [ ] I used 3+1 palette
        • [ ] Clear light vs. dark separation on adjacent planes
        • [ ] One accent location (≤5% of parts)
        • [ ] Focal point reads at thumbnail size
        • [ ] Edges tiled/clean where it helps readability
        • [ ] Stable enough to pick up and photograph

        Mini Challenges

        1. Mono-Value Rescue: build in one hue family (blues). Make it readable using value/texture only.
        2. Accent Swap: duplicate the build and move the accent. Which comp reads better?
        3. Two-Photo Story: shoot a neutral shot and a tilt/low-angle shot. Which makes the accent pop more?

        Parts You Probably Own (No Rare Bits)

        • Tiles: 1×2, 2×2, 1×4
        • Plates: 1×2, 2×2, jumpers
        • Brackets: 1×2–2×2, 1×1–1×1
        • Headlight bricks, grille tiles, round plates 1×1 (for accents)
        • Optional: cheese slopes, modified tiles with clips/bars

        Share It

        Post with the tag #MiniMOD and list your 3+1 palette in the caption. Then try scaling your favorite into a micro-diorama while keeping the same palette rules.


        Photograph Your LEGO Builds Like a Pro · 10 Creative Part Re-uses You Already Own

        ← Back to MOD U

      3. Final Lego Fan Plans Build Mockup — Instantly Visualize Your LEGO® MOD

        Design Like a Pro

        Final Build Mockup — Instantly Visualize Your LEGO® MOD

        Drop any LEGO1 Fan Plans prompt into chat and get a studio-grade image of the finished model — before you buy parts or build. This is the same concept-viz workflow used by professional kit designers.

        How to Use It (60-second setup)

        1. Create your plan with any LEGO1 Generator (Classic, Fiesta, or WTF).
        2. Copy the plan prompt into chat.
        3. Ask the bot: Show me a detailed final Lego block build image as you would build it using the plans
        4. Done! Save or share your studio-style image.

        Tip: tweak view, lighting, backdrop, and emphasis to fit your model before copying.

        AI & LEGO® Design — Clearing Up Doubts

        Does AI replace real building?

        No. It’s a visualization step, like a digital light-table. You still make all design choices — the AI just gives you a fast, photo-quality preview of your idea.

        Are the images “realistic” to build?

        Images reflect sensible wall thicknesses and legal geometry. Treat them as a guide to refine proportions, color blocking, and module splits before sourcing parts.

        Why do pros use mockups?

        Professionals iterate quickly on form and color long before physical prototypes. Our tool brings that same workflow to MOD builders — save budget, improve accuracy, and present like a studio.

        How do I keep the mockup limited to real LEGO parts and colors?

        Add cues like “use only existing LEGO element geometry and production colors” and specify “no custom or fantasy parts.” This nudges the preview toward buildable shapes and palettes.

        Will the mockup respect minifig scale or other target scales?

        Yes — mention your target scale, e.g., “minifig scale (1:42)” or “microscale,” and note key dimensions (“fits a minifig inside,” “8-stud-wide vehicle”). Scale cues make proportions clearer.

        Can I request multiple views or exploded modules for planning?

        Absolutely. Ask for “three angles: front 45°, rear 45°, top” or “exploded view showing module splits and connection points.” This helps plan subassemblies before ordering parts.

        What if the result looks too smooth or not ‘studly’ enough?

        Use constraints like “visible studs on top surfaces,” “tile sparingly,” or “show anti-studs underneath where appropriate.” These hints push the render toward authentic brick texture.

        How do I move from a mockup to a parts list and digital file?

        Translate the preview into a Studio/LDraw model, then export a parts list. Cross-check colors against current availability on BrickLink, and adjust where rare elements spike the budget.

      4. Can You Make Blocks and Parts with a 3D Printer?

        3D Printing LEGO-Compatible Parts — Pros & Cons
        LEGO-themed 3D printing banner
        The Pros and Cons of Printing Custom LEGO-Compatible Bricks

        In the age of desktop fabrication, one question keeps popping up in maker spaces and LEGO fan forums alike:

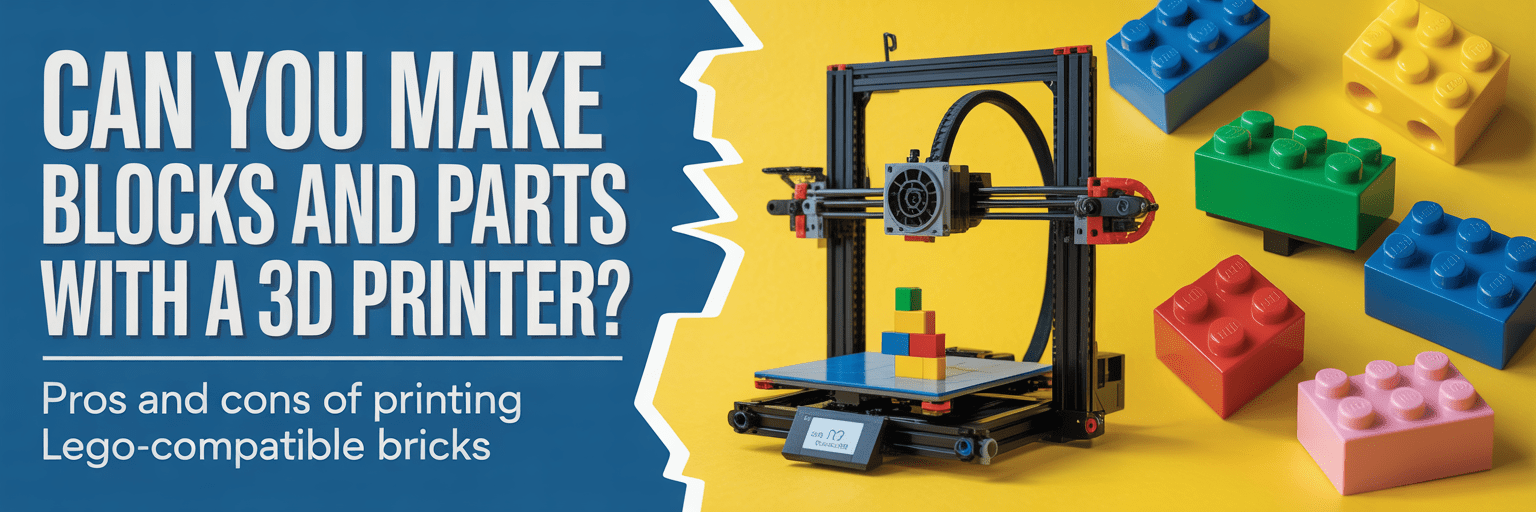
        Can you 3D print your own LEGO bricks and parts?

        The short answer: Yes, but with caveats. The longer answer? Let’s break it down.


        🧱 Why Print Your Own LEGO-Compatible Parts?

        Whether you’re a MOC (My Own Creation) builder, an educator with a tight budget, or a designer prototyping new mechanisms, 3D printing offers exciting possibilities. But it’s not a perfect substitute for injection-molded ABS bricks. Here’s a closer look:


        ✅ Pros of 3D Printing LEGO-Compatible Parts

        • Creative Freedom: Design parts LEGO never made—hinges, brackets, curved slopes, or Technic hybrids. Want a 1×5 plate? Go for it.
        • Rapid Prototyping: Test new ideas without waiting for BrickLink orders. Iterate on custom parts in hours, not days.
        • Cost Efficiency (Sometimes): For rare or discontinued parts, printing can be cheaper than aftermarket prices—especially for large or decorative elements.
        • Educational Value: Great for STEM classrooms. Students can design, print, and test their own functional parts.
        • Customization: Add logos, textures, or colors not available in official bricks. Even print in flexible or translucent filaments.

        ❌ Cons of 3D Printing LEGO-Compatible Parts

        • Precision Issues: LEGO tolerances are insanely tight—down to 10 microns. Most hobbyist 3D printers can’t match that, leading to loose or overly tight fits.
        • Material Differences: PLA and PETG don’t behave like ABS. They’re more brittle, less glossy, and may not clutch reliably.
        • Time-Consuming: Printing a single brick can take 10–30 minutes. A full set? Hours or days.
        • Legal Gray Area: LEGO’s patents have expired, but the brand and minifigures are still protected. Selling printed parts can be risky.
        • Aesthetic Mismatch: Layer lines, inconsistent color, and surface texture often make printed parts stand out in a build.

        🧪 So… Should You Do It?

        Here’s a quick decision matrix:

        Use Case 3D Printing Viable? Notes
        Custom Technic connectors ✅ Yes Great for prototyping
        Replacing standard bricks ❌ No Buy official for clutch power
        Oversized display elements ✅ Yes Ideal for museum-scale builds
        Classroom STEM projects ✅ Yes Encourages design thinking
        Selling printed parts ⚠️ Risky Check IP laws first
        Minifigure accessories ⚠️ Maybe Fun, but legally tricky

        🛠️ Pro Tip: Blend Both Worlds

        Many advanced builders use 3D printing to complement—not replace—official LEGO parts. Use printed parts for structural supports, custom mounts, or display bases, while keeping core clutch elements official.

        Final Verdict: Yes, But Know the Tradeoffs

        3D printing opens up a world of possibilities for LEGO fans, but it’s not a one-size-fits-all solution. For creative, educational, or display purposes, it’s a fantastic tool. For playability, durability, and perfect fit? The LEGO Group still reigns supreme.


      5. Lego Fan Plans — Chitty Chitty Bang Bang

        Chitty Chitty Bang Bang — LEGO Fan Plans Banner
        How to Read These Plans

        Level 1 — Snapshot


        Level 2 — Builder Brief


        Level 3 — Detailed Plan


        Level 4 — Press Release (Best For Comics)


        Research Notes

        Chitty Chitty Bang Bang first appeared in the 1964 Ian Fleming children’s novel, and became world-famous via the 1968 film. The car is a whimsical Edwardian racing-plus-flying roadster, blending brass, leather, wings, pontoons, and theatrical coachwork. This generator adapts its essential profile to real, legal LEGO elements — using current Technic spine, removable bodywork, and plausible period trim.

        History of the Car

        Real-world inspirations include Count Zborowski’s early aero-engined racers (“Chitty 1–4”). The cinematic Chitty married Edwardian coachcraft with fantastical flight gear. Hallmarks: polished brass, red/white striping, running boards, flight-wing cassettes, pontoons, and a leather-finished cabin.

        Chitty v1.0 • Real-Build Mode
      6. Lego Fan Plans — Horten Ho 229 all-wing jet-fighter

        Lego Fan Plans — Horten Ho 229 (All‑Wing Jet Fighter)

        Air Force blue refresh with uniform menus. Paste or use your existing controls below — this block won’t change your generator logic, just the look & feel.

        Real‑Build Mode: produces buildable LEGO plans using standard, real parts only — no photom parts and no fantasy bricks. If a requested part isn’t available, the plan substitutes supported equivalents.

        Controls

        Uniform menus enabled ✔

        Outputs

        Parts List (Real‑Build)

        (Exact bill of materials with only real, supported elements will appear here.)

        Builder Brief

        (Your generator’s brief will appear here.)

        Detailed Prompt

        (Your detailed prompt.)

        Press‑Style

        (Press‑release style copy.)
      7. World’s Greatest Tanks — From WWI to Afghanistan · Lego Fan Plans

        World’s Greatest Tanks — From WWI to Afghanistan · Lego Fan Plans

        Real‑Build Mode Only Brick-Link bricks No Fantasy parts

        Skill Level 1 — Starter

        Skill Level 2 — Builder

        Skill Level 3 — Advanced

        Skill Level 4 — Expert

      8. Lego Fan Plans — Charlie’s Chocolate Factory

        Lego Fan Plans — Charlie’s Chocolate Factory

        Real‑Build Mode · BrickLink‑friendly parts. Inspired by Lego set #21360

        Level 1 — Snapshot

        Level 2 — Builder Brief

        Level 3 — Detailed Prompt

        Level 4 — Press Release