Author: Clark2368

  • MOD U: Color Blocking & Contrast for Mini-MODs

    MOD U lesson banner

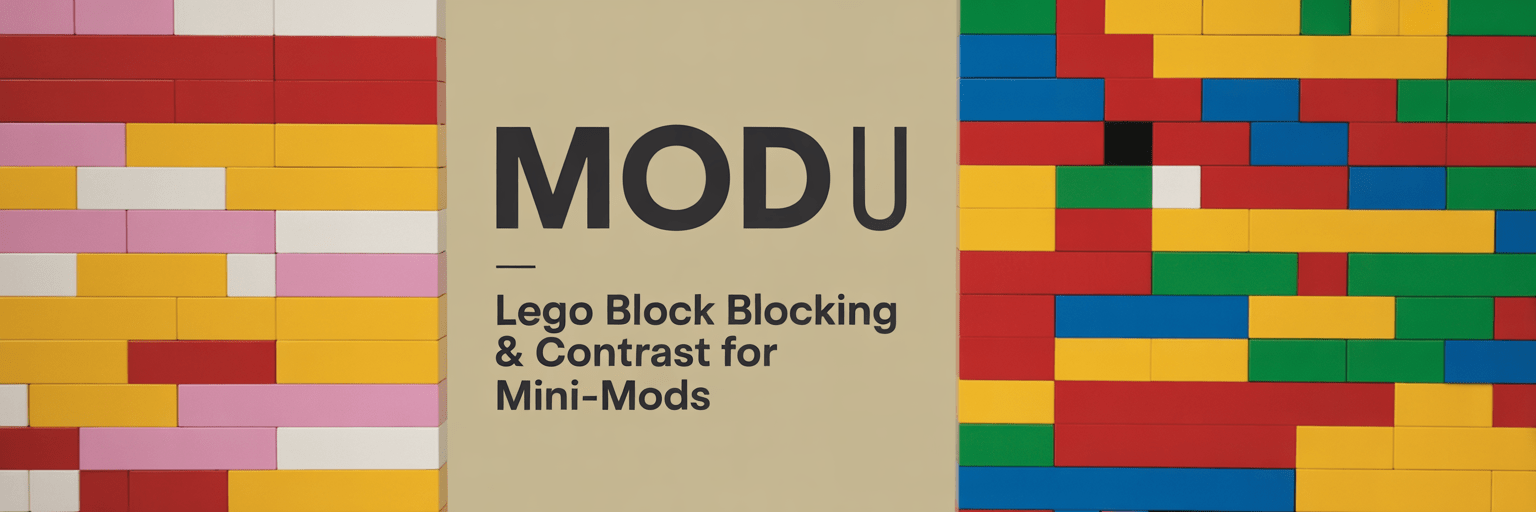
    Why Color Blocking Matters (Especially for Mini-MODs)

    Mini builds live or die by readability. With fewer studs to communicate form, your color choices must do extra work: separate planes, guide the eye, and frame a point of interest. This lesson gives you a simple system to make any small build “read” instantly—even at phone-thumbnail size.

    The Three Rules

    1. Limit the palette (3+1): two mains, one neutral, one accent.
    2. Separate by value: keep light vs. dark on adjacent planes.
    3. One accent, one job: use it to point at the focal detail (sign, canopy stripe, flower, logo).

    Starter Palettes You Already Own

    • City Pop: Bright Light Blue (main), White (main), Light Bluish Gray (neutral), Yellow (accent)
    • Industrial: Dark Bluish Gray (main), Light Bluish Gray (main), Black (neutral), Trans-Light Blue (accent)
    • Desert Tan: Tan (main), Dark Tan (main), Reddish Brown (neutral), Dark Red (accent)
    • Forest: Dark Green (main), Olive (main), Dark Bluish Gray (neutral), Bright Light Orange (accent)

    Tip: If you don’t have the exact color, substitute by value (light vs. dark) instead of hue.

    60-Minute Build-Along: From Gray Blob to Readable Mini

    Goal: 12×12 base (or smaller), a micro-scene with one focal object (kiosk, food cart, lifeguard chair, robot).
    Constraint: Use the 3+1 palette and keep accent pieces under 5% of total parts.

    1. Sketch in 3 shapes (5 min): base, main form, topper using only your two mains. No accent yet.
    2. Assign values (5 min): choose which block is light and which is dark; swap one for neutral if needed.
    3. Edge readability (8 min): add SNOT tiles/plates to make clean light/dark borders (roofline, chassis, sign).
    4. Focal point (6 min): pick ONE location for the accent (stripe, eye, frame). Add it and stop.
    5. Secondary details (10 min): add 2–3 micro details using mains + neutral only; keep them quiet.
    6. Grounding (6 min): neutral base; use darker main to “shadow” under overhangs.
    7. Read test (5 min): arm’s-length or 150px-tall phone view. If unclear, increase value split or reduce accent.
    8. Lock-in (5 min): secure connections; color-correct hidden internals; ensure display stability.

    Common Color Pitfalls (and Fast Fixes)

    • Muddy middle: mains too similar in value → lighten one plane or tile the lighter plane.
    • Accent sprawl: accent shows up everywhere → remove all but one cluster/line.
    • No focal path: eye drifts → create a light-to-dark “ladder” aimed at the accent.

    Part Re-use Moves that Boost Readability

    • Inverted tiles as borders: 2×2 tiles on headlight bricks for razor-edge stripes.
    • Bracket picture frames: 1×2–2×2 brackets to frame signage with a one-plate recess (shadow = value contrast).
    • Grille tiles as shading: run grilles on the dark side to deepen perceived value without changing color.

    Quick Photo Setup for Color Truth

    • Background: plain white or mid-gray card.
    • Lighting: two desk lamps at 45°, diffused with printer paper.
    • White balance: set to “Daylight.”
    • Thumbnail test: export a 1:1 crop at ~600 px; check read at 25% zoom.

    At-a-Glance Checklist (Copy/Paste)

    • [ ] I used 3+1 palette
    • [ ] Clear light vs. dark separation on adjacent planes
    • [ ] One accent location (≤5% of parts)
    • [ ] Focal point reads at thumbnail size
    • [ ] Edges tiled/clean where it helps readability
    • [ ] Stable enough to pick up and photograph

    Mini Challenges

    1. Mono-Value Rescue: build in one hue family (blues). Make it readable using value/texture only.
    2. Accent Swap: duplicate the build and move the accent. Which comp reads better?
    3. Two-Photo Story: shoot a neutral shot and a tilt/low-angle shot. Which makes the accent pop more?

    Parts You Probably Own (No Rare Bits)

    • Tiles: 1×2, 2×2, 1×4
    • Plates: 1×2, 2×2, jumpers
    • Brackets: 1×2–2×2, 1×1–1×1
    • Headlight bricks, grille tiles, round plates 1×1 (for accents)
    • Optional: cheese slopes, modified tiles with clips/bars

    Share It

    Post with the tag #MiniMOD and list your 3+1 palette in the caption. Then try scaling your favorite into a micro-diorama while keeping the same palette rules.


    Photograph Your LEGO Builds Like a Pro · 10 Creative Part Re-uses You Already Own

    ← Back to MOD U

  • Final Build Mockup — Instantly Visualize Your LEGO® MOD

    Design Like a Pro

    Final Build Mockup — Instantly Visualize Your LEGO® MOD

    Drop any LEGO1 Fan Plans prompt into chat and get a studio-grade image of the finished model — before you buy parts or build. This is the same concept-viz workflow used by professional kit designers.

    How to Use It (60-second setup)

    1. Create your plan with any LEGO1 Generator (Classic, Fiesta, or WTF).
    2. Copy the plan prompt into chat.
    3. Ask the bot: Show me a detailed final Lego block build image as you would build it using the plans
    4. Done! Save or share your studio-style image.

    Tip: tweak view, lighting, backdrop, and emphasis to fit your model before copying.

    AI & LEGO® Design — Clearing Up Doubts

    Does AI replace real building?

    No. It’s a visualization step, like a digital light-table. You still make all design choices — the AI just gives you a fast, photo-quality preview of your idea.

    Are the images “realistic” to build?

    Images reflect sensible wall thicknesses and legal geometry. Treat them as a guide to refine proportions, color blocking, and module splits before sourcing parts.

    Why do pros use mockups?

    Professionals iterate quickly on form and color long before physical prototypes. Our tool brings that same workflow to MOD builders — save budget, improve accuracy, and present like a studio.

    How do I keep the mockup limited to real LEGO parts and colors?

    Add cues like “use only existing LEGO element geometry and production colors” and specify “no custom or fantasy parts.” This nudges the preview toward buildable shapes and palettes.

    Will the mockup respect minifig scale or other target scales?

    Yes — mention your target scale, e.g., “minifig scale (1:42)” or “microscale,” and note key dimensions (“fits a minifig inside,” “8-stud-wide vehicle”). Scale cues make proportions clearer.

    Can I request multiple views or exploded modules for planning?

    Absolutely. Ask for “three angles: front 45°, rear 45°, top” or “exploded view showing module splits and connection points.” This helps plan subassemblies before ordering parts.

    What if the result looks too smooth or not ‘studly’ enough?

    Use constraints like “visible studs on top surfaces,” “tile sparingly,” or “show anti-studs underneath where appropriate.” These hints push the render toward authentic brick texture.

    How do I move from a mockup to a parts list and digital file?

    Translate the preview into a Studio/LDraw model, then export a parts list. Cross-check colors against current availability on BrickLink, and adjust where rare elements spike the budget.

  • Can You Make Blocks and Parts with a 3D Printer?

    3D Printing LEGO-Compatible Parts — Pros & Cons
    LEGO-themed 3D printing banner
    The Pros and Cons of Printing Custom LEGO-Compatible Bricks

    In the age of desktop fabrication, one question keeps popping up in maker spaces and LEGO fan forums alike:

    Can you 3D print your own LEGO bricks and parts?

    The short answer: Yes, but with caveats. The longer answer? Let’s break it down.


    🧱 Why Print Your Own LEGO-Compatible Parts?

    Whether you’re a MOC (My Own Creation) builder, an educator with a tight budget, or a designer prototyping new mechanisms, 3D printing offers exciting possibilities. But it’s not a perfect substitute for injection-molded ABS bricks. Here’s a closer look:


    ✅ Pros of 3D Printing LEGO-Compatible Parts

    • Creative Freedom: Design parts LEGO never made—hinges, brackets, curved slopes, or Technic hybrids. Want a 1×5 plate? Go for it.
    • Rapid Prototyping: Test new ideas without waiting for BrickLink orders. Iterate on custom parts in hours, not days.
    • Cost Efficiency (Sometimes): For rare or discontinued parts, printing can be cheaper than aftermarket prices—especially for large or decorative elements.
    • Educational Value: Great for STEM classrooms. Students can design, print, and test their own functional parts.
    • Customization: Add logos, textures, or colors not available in official bricks. Even print in flexible or translucent filaments.

    ❌ Cons of 3D Printing LEGO-Compatible Parts

    • Precision Issues: LEGO tolerances are insanely tight—down to 10 microns. Most hobbyist 3D printers can’t match that, leading to loose or overly tight fits.
    • Material Differences: PLA and PETG don’t behave like ABS. They’re more brittle, less glossy, and may not clutch reliably.
    • Time-Consuming: Printing a single brick can take 10–30 minutes. A full set? Hours or days.
    • Legal Gray Area: LEGO’s patents have expired, but the brand and minifigures are still protected. Selling printed parts can be risky.
    • Aesthetic Mismatch: Layer lines, inconsistent color, and surface texture often make printed parts stand out in a build.

    🧪 So… Should You Do It?

    Here’s a quick decision matrix:

    Use Case 3D Printing Viable? Notes
    Custom Technic connectors ✅ Yes Great for prototyping
    Replacing standard bricks ❌ No Buy official for clutch power
    Oversized display elements ✅ Yes Ideal for museum-scale builds
    Classroom STEM projects ✅ Yes Encourages design thinking
    Selling printed parts ⚠️ Risky Check IP laws first
    Minifigure accessories ⚠️ Maybe Fun, but legally tricky

    🛠️ Pro Tip: Blend Both Worlds

    Many advanced builders use 3D printing to complement—not replace—official LEGO parts. Use printed parts for structural supports, custom mounts, or display bases, while keeping core clutch elements official.

    Final Verdict: Yes, But Know the Tradeoffs

    3D printing opens up a world of possibilities for LEGO fans, but it’s not a one-size-fits-all solution. For creative, educational, or display purposes, it’s a fantastic tool. For playability, durability, and perfect fit? The LEGO Group still reigns supreme.


  • Lego Fan Plans — Chitty Chitty Bang Bang

    Lego Fan Plans — Chitty Chitty Bang Bang

    Real-Build Mode • BrickLink-only parts • Museum-grade replica of the Chitty car plus large diorama modules (Potts’ windmill workshop, Neuschwanstein courtyard landing, Child Catcher wagon, Truly Scrumptious toot-sweet kitchen).

    Final Prompts (Levels 1–4)

    Blank until you click Generate.

    Level 1 — Snapshot


    Level 2 — Builder Brief


    Level 3 — Detailed Plan


    Level 4 — Press‑Style


  • Lego Fan Plans — Horten Ho 229 all-wing jet-fighter

    Lego Fan Plans — Horten Ho 229 (All‑Wing Jet Fighter)

    Air Force blue refresh with uniform menus. Paste or use your existing controls below — this block won’t change your generator logic, just the look & feel.

    Real‑Build Mode: produces buildable LEGO plans using standard, real parts only — no photom parts and no fantasy bricks. If a requested part isn’t available, the plan substitutes supported equivalents.

    Controls

    Uniform menus enabled ✔

    Outputs

    Parts List (Real‑Build)

    (Exact bill of materials with only real, supported elements will appear here.)

    Builder Brief

    (Your generator’s brief will appear here.)

    Detailed Prompt

    (Your detailed prompt.)

    Press‑Style

    (Press‑release style copy.)
  • World’s Greatest Tanks — From WWI to Afghanistan · Lego Fan Plans

    World’s Greatest Tanks — From WWI to Afghanistan · Lego Fan Plans

    Real‑Build Mode Only Brick-Link bricks No Fantasy parts

    Skill Level 1 — Starter

    Skill Level 2 — Builder

    Skill Level 3 — Advanced

    Skill Level 4 — Expert

  • Lego Fan Plans — Charlie’s Chocolate Factory

    Lego Fan Plans — Charlie’s Chocolate Factory

    Real‑Build Mode · BrickLink‑friendly parts. Inspired by Lego set #21360

    Level 1 — Snapshot

    Level 2 — Builder Brief

    Level 3 — Detailed Prompt

    Level 4 — Press Release

  • Lego Fan Plans — Santa’s Modern Toy Factory

    Santa’s Modern Toy Factory — LEGO1 Generator (Standalone)

    Santa’s Modern Toy Factory

    Lego Fan Plans • Conveyor lines • Wrapping station • Loading dock • Festive palette • Interior play features

    Build a structured prompt from the menus; click Generate to assemble four variants. Copy an individual level or use Copy All. When ready, click Export for Make‑It Blocks to copy a converter‑ready plan (Title → BOM → Steps → Notes).
    Tip: On desktop, use Ctrl/Cmd‑click for multi‑select; on mobile, tap to add / tap again to remove.

    Basic

    Intermediate

    Advanced

    Crazy Wild

  • Famous Tourist Spots in Los Angeles

    Famous Tourist Spots in Los Angeles

    Lego Fan Plans

    REAL-BUILD MODE: Legal Techniques • Stable • Sourceable Parts

    Level 1 — Basic Snapshot

    Level 2 — Builder Brief

    Level 3 — Detailed Prompt

    Level 4 — Pro / Crazy Detail

  • Famous San Francisco Buildings and Land Marks

    Famous San Francisco Buildings and Land Marks

    Lego Fan Plans

    REAL-BUILD MODE: Legal Techniques • Stable • Sourceable Parts

    Level 1 — Basic Snapshot

    Level 2 — Builder Brief

    Level 3 — Detailed Prompt

    Level 4 — Pro / Crazy Detail