Category: Lego Fan Plans

  • Color & Contrast Mastery for Mini-MODs

    MOD U Class: Color & Contrast Mastery for Mini-MODs

    Pick palettes with purpose, place accents like a pro, and make tiny builds read clearly at a glance.

    Why Color Rules Mini-MODs

    • Readability: Clear palette hierarchy makes small builds instantly understandable.
    • Focus: Accents steer the eye to your hero detail or story beat.
    • Mood: Warm vs. cool tones shift the scene’s energy without extra parts.
    Guiding idea: One hero color, one support color, neutrals for structure, and tiny bright accents near the focal point.

    Palette Formulas that Just Work

    H+S+N+A (Hero + Support + Neutrals + Accent)

    • Hero: your headline hue (e.g., red kiosk).
    • Support: complementary or analogous (e.g., dark tan).
    • Neutrals: light/dark gray, black, white.
    • Accent: tiny pop (e.g., bright yellow transparent rounds).

    Two-Tone + Metal

    • Two main hues, plus dark bluish gray/black as “metal.”
    • Great for vehicles and micro-mechs.
    Market Kiosk: Red hero • Dark tan support • Grays neutral • Yellow accent
    Rooftop Garden: Blue hero • Green support • Light gray neutral • Orange accent
    Industrial Micro-Mech: Dark grays hero/support • Black neutral • Yellow hazard accent
    Beach Cart: Teal hero • Sand yellow support • Light gray neutral • Red accent

    Contrast: Make the Focal Pop

    • Value contrast: Place light tiles against dark plates (or vice versa) around your hero.
    • Hue contrast: Use the accent sparingly—near signage, eyes, or control panels.
    • Edge clean-up: Keep the base’s perimeter one consistent neutral for a framed look.
    • Selective tiling: Tile near the focal, leave studs in the background for texture depth.
    Rule of Small Accents: Keep accents under ~5% of the build. If you see them everywhere, they aren’t accents.

    Smart Placement Patterns

    • Halo the Hero: A ring of slightly lighter tiles around a dark hero object (or the reverse) frames it instantly.
    • Diagonal Flow: Run your hero color in a subtle diagonal—eye movement feels dynamic on small builds.
    • Vertical Anchor: Stack a 1×1 accent “light post” near the focal to pin the viewer’s attention.
    • Shadow Push: Add a canopy or recess behind the hero to create natural contrast without new hues.

    Common Pitfalls & Quick Fixes

    • Too many brights: Remove two colors; reassign to neutral. Keep one bright as the accent.
    • Muddy midtones: Add a single light tile “stripe” or a dark outline to define shapes.
    • Busy edges: Standardize the base rim color; tile the rim last.
    • Hero lost: Reduce support color near the focal; boost value contrast there.

    20-Minute Palette Workout

    1. Pick an H+S+N+A combo from the swatches above (or invent one).
    2. Lay a 12×12 footprint using only neutrals.
    3. Place your hero object (use the hero hue on 60% of it).
    4. Add support color in two small regions (not everywhere).
    5. Place three accent studs/tiles around the focal—no more.
    6. Photograph at 45° front-left; if the focal doesn’t read in 1 second, increase value contrast.
    Test trick: Snap a phone pic and view it in grayscale—if the hero still stands out, your value contrast is solid.

    Color Readability Checklist

    • ✔ One clear hero hue (largest area at focal)
    • ✔ One support hue (limited regions)
    • ✔ Neutrals ground the build and frame edges
    • ✔ Accents < 5% and near story beats
    • ✔ Value contrast around the hero is obvious in grayscale

    What’s Next?

    Apply this palette method to a 16×16 street-corner vignette, then try the same scene with a different hero color and compare results.

    Start with the MOD U How-To
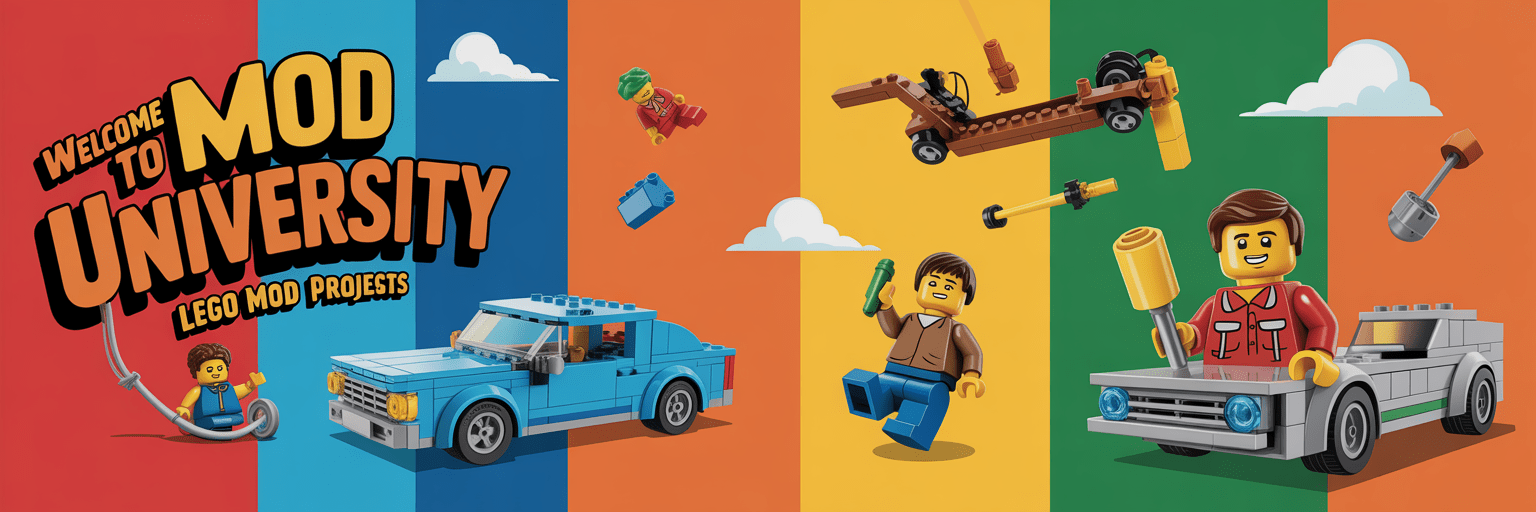
  • MOD U — LEGO Mini Build University MOD U — Mini-Build University

    MOD U — LEGO Mini Build University

    MOD U — Mini-Build University

    Bite-size lessons, bold color, real-build techniques. Learn fast, build smart—no rare parts required.

    Mini-MOD Part Re-use Photography Workflow Business & SEO Pro Tips

    Unlocking Creativity: Mini MOD Builds

    Design colorful, bite-size builds with parts you already own—finish in one sitting and learn repeatable techniques.

    Lesson • Creativity & Constraints
    Start Lesson

    Color Blocking That Pops

    Use limited palettes, value contrast, and accent rules so your mini-MOD reads instantly at thumbnail size.

    Lesson • Color & Readability
    Start Lesson

    10 Creative Part Re-uses You Already Own

    Flip, offset, and repurpose common pieces for pro-level detail, cleaner SNOT, and stronger connections.

    Lesson • Techniques
    Read Lesson

    Photograph Your LEGO Builds Like a Pro

    Simple lighting, clean backgrounds, and smart angles—make your creations pop without fancy gear.

    Lesson • Presentation
    Read Lesson

    MOD U: Build a Mini-MOD from Scratch

    A step-by-step workflow: spark → sketch → sturdy display build in one session, with story-first details.

    Lesson • Workflow
    Start Building

    Can I Make Money Selling My LEGO MODs?

    Yes—sell digital instructions, parts packs, and commissions with SEO that ranks and converts in 2025.

    Lesson • Business & SEO
    Read Guide

    MOD U: Tips of the Trade

    Veteran habits and shortcuts for stronger structure, cleaner color, and pro presentation—fast.

    Lesson • Pro Tips
    Read Tips

    Ready for the Next Challenge?

    Pick a lesson, set a 60-minute timer, and post your mini-MOD with the constraints you used. Then scale your favorite into a micro-diorama.

    Begin with “Unlocking Creativity”
  • MOD U: How to Build a Mini-MOD from Scratch (Step-by-Step)

    MOD U: How to Build a Mini-MOD from Scratch (Step-by-Step)

    From spark → sketch → sturdy display piece. A friendly workflow you can finish in one sitting.

    Welcome to MOD U—your classroom for turning loose LEGO parts into polished, display-ready micro-builds. Whether you’re a weekend builder or an educator looking for fast classroom projects, this method takes you from idea to finished piece without needing rare parts or expensive sets.

    Mindset: Constraints fuel creativity. Small builds become masterpieces when you set clear limits and follow a story.

    1) Pick a Spark & Set Constraints

    • Spark: Choose a theme—street cart, garden nook, micro-mech, or tiny kiosk.
    • Footprint: 12×12 or 16×16 studs.
    • Pieces: 60 or fewer.
    • Palette: 3 colors + neutrals.
    • Time: 60 minutes start-to-finish.

    2) Choose a Balanced Palette

    • Pick one hero color and one support tone.
    • Keep neutrals (gray, tan, black) for grounding.
    • Save bright accents for signage, windows, or lighting details.

    3) Sketch Your Build Modules

    • Module A: Base or terrain.
    • Module B: Main object or structure.
    • Module C: Story beat—minifig or prop that adds life.
    Pro tip: Use 1×2 jumpers for half-stud offsets to center doors, rails, and signs.

    4) Build for Strength

    1. Stack plates for the base; tile selectively for texture.
    2. Use brackets or headlight bricks for clean SNOT faces.
    3. Lock subassemblies together before adding delicate details.
    4. Run the “shake test”—if it rattles, reinforce hidden joints.

    5) Detail & Storytelling

    • Clips + bars make lamps, rails, and scaffolds.
    • Cheese slopes = shingles or rocky texture.
    • Transparent rounds = bulbs, drinks, or gauges.
    • Minifig hands + bars = tiny brackets or hinges.

    6) Photograph the Final Build

    • Use window light and a white poster board background.
    • Shoot a 45° front-left “hero” view plus a low eye-level angle.
    • Bounce light with white card to soften shadows.
    • Keep color edits minimal—show true LEGO hues.

    7) The 30-Minute MOD U Challenge

    1. Pick a theme & palette (3 min)
    2. Build base (7 min)
    3. Hero object (12 min)
    4. Add story beat (6 min)
    5. Polish & photo (2 min)
    Share it! Post your mini build with your constraints listed—challenge others to remix your setup.

    8) Reflect & Level Up

    Review what worked, what wobbled, and what popped visually. Take one photo, then rebuild it in a different theme or palette. Iteration is how you develop your signature MOD style.

    What’s Next?

    Ready to go beyond single-scene builds? Explore Mini-MOD Challenges on TacoCat in Texas for themed prompts, real-build examples, and printable guides.

    Explore More MOD U Lessons

    Graduation goal: Complete three mini-MODs in a week. When you’ve found your favorite, expand it into a full diorama using our next guide: “Scaling a Mini-MOD into a Full Diorama.”

  • Scaling a Mini-MOD into a Full Diorama

    Scaling a Mini-MOD into a Full Diorama

    Turn a small scene into an immersive world with footprint planning, layered composition, and story-first details.

    Mini-MODs are perfect proofs of concept. When one deserves a bigger stage, you don’t just “add more bricks”—you expand the story, composition, and pathways so the scene feels alive. This guide shows you how to scale thoughtfully, keep stability, and finish with photos that sell the narrative.

    Mindset: Your mini is the focal set piece. Everything you add should serve it, not overshadow it.

    1) Plan the Footprint First

    Choose a Format

    • Rectangular base (e.g., 32×32): versatile streetscapes, interiors.
    • Widescreen (48×32): vehicles in motion, landscapes, panoramas.
    • Vertical (32×32 plus height): towers, cliffs, tree canopies.

    Block the Scene

    • Place your mini-MOD where the eye should land first (rule of thirds sweet spot).
    • Reserve negative space for contrast and breathing room.
    • Sketch zones: foreground (texture), midground (action), background (context).

    2) Build in Layers (Depth = Drama)

    • Foreground: Add texture—curb, plants, rubble, fence. Keep elements low to frame the hero.
    • Midground: Your mini-MOD lives here. Enhance with signage, props, and secondary characters.
    • Background: Simple silhouettes (hills, skyline, interior wall). Light detail; avoid noisy patterns.
    Pro tip: Stagger heights slightly between layers to avoid a flat “wall” behind the hero.

    3) Story Beats & Focal Hierarchy

    Decide the moment—arrival, chase, quiet morning, emergency repair. Then place clues that support it:

    • Primary focal: The hero element from the mini-MOD (vehicle, kiosk, treehouse).
    • Secondary: One supporting character or object (customer, mechanic, animal).
    • Ambient cues: Posters, litter, tools, signage, footprints—tiny hints amplify the tale.
    Keep it readable: If everything shouts, nothing speaks. Use color and contrast to keep the primary focal unmistakable.

    4) Pathways, Sightlines, and Flow

    • Create a path (road, trail, boardwalk) that leads into the frame and arcs past the hero.
    • Angle walls and fences at 10–30° to avoid parallel “tunnel vision.”
    • Use overlaps (a sign in front of a wall, a canopy over a door) to convey depth.
    • Leave pockets of space so minifigs have believable movement options.

    5) Elevation & Terrain Tricks

    • Stack plates to create subtle slopes; mix normals and inverted slopes for natural ground.
    • Use jumpers for half-stud offsets—great for staggered sidewalks and rocky strata.
    • Hide color noise inside the base; keep outer shell cohesive for clean edges.

    6) Palette, Lighting, and Atmosphere

    • Color hierarchy: 1–2 main hues + neutrals. Reserve accents for the hero focal.
    • Micro-lighting: Transparent rounds + plates make marquee bulbs and lamps.
    • Shadow control: Add canopies and recesses behind the hero to push it forward.
    Upgrade path: If you add LEDs later, pre-plan wire channels under tiles.

    7) Modularize for Stability & Transport

    • Break the build into liftable modules: base, façade, roofline, landscape cap.
    • Use Technic pins or tiles + jumpers as repeatable connection points.
    • Tile the perimeter last for a clean, exhibition-ready border.

    8) Diorama Readiness Checklist

    • ✔ Primary focal clear at first glance
    • ✔ Fore/Mid/Background layered and readable
    • ✔ Pathway leads the eye through the scene
    • ✔ Stable modules; easy to move
    • ✔ Color accents reserved for the hero
    • ✔ A few story props (but not clutter)

    9) Photograph the Diorama

    • Shoot a 45° front-left hero shot; then a low-angle “minifig eye-level” photo.
    • Capture three close-ups: hero detail, pathway texture, background silhouette.
    • Use a neutral sweep (white/gray) or real sky; bounce light with white card to fill shadows.

    Share the build’s title, footprint size, and a one-sentence story caption to frame the viewer’s imagination.

    10) 60-Minute Scale-Up Workout

    1. Drop your mini-MOD on a 32×32 base at a thirds point.
    2. Lay a simple pathway that curves past the hero.
    3. Add a thin foreground frame (curb, shrubs, posts).
    4. Build a low-detail background silhouette.
    5. Place two story props and one secondary character.
    6. Stabilize connections; tile perimeter; shoot the hero photo.

    That’s it—your mini is now a full scene with depth, flow, and a clear story. Want a compact-card snippet for this post or tweaks to match your WordPress layout?

  • Photograph Your LEGO Builds Like a Pro

    Photograph Your LEGO Builds Like a Pro

    Simple setup, smart lighting, and shot composition tips that make your builds shine—no fancy gear required.

    You’ve spent hours designing and building something special. Now it’s time to capture it in all its glory. Great photography can elevate your LEGO creation from “neat build” to “wow!”—and it doesn’t require professional cameras or studio lights. Here’s how to take clean, dynamic photos that do justice to your hard work.

    1. Let There Be Light

    • Use natural light: Set up near a window with bright, indirect light. Morning and late-afternoon light are ideal.
    • Avoid overhead bulbs: They cast harsh shadows and yellow tones. If you must, diffuse them with white tissue or paper.
    • Fill in shadows: Use a sheet of white paper or cardboard opposite the light source to bounce light back onto your model.
    Pro tip: Photograph during “golden hour” for soft, warm tones that make colors pop naturally.

    2. Pick the Right Background

    Your background should highlight your build—not compete with it.

    • Use a neutral background like white, gray, or light blue poster board.
    • Curving the board upward behind your model creates a “seamless” look with no visible edge.
    • For outdoor scenes, use real grass, concrete, or sky—but keep clutter out of frame.

    3. Compose Like an Artist

    • Rule of thirds: Imagine your frame split into a 3×3 grid. Place the build slightly off-center for a natural look.
    • Low angle = epic: Shooting from below makes builds look larger and more heroic.
    • 45° front-left angle: The classic LEGO shot—shows front and side depth in one frame.
    • Leave breathing room: Don’t crop too tightly; let the model “sit comfortably” in the frame.

    4. Use What You Have (Even a Phone)

    • Most phones today have excellent cameras—use the main lens, not ultra-wide (which can distort).
    • Tap to focus on the model’s key detail (like a face or vehicle logo).
    • Use the exposure slider to avoid blown-out highlights.
    • Always shoot multiple takes: different angles, distances, and lighting variations.
    Bonus: Turn on “grid lines” in your camera settings to keep horizons level.

    5. Edit Lightly—Don’t Overdo It

    • Crop for framing and symmetry.
    • Boost brightness slightly if needed.
    • Increase contrast or “clarity” only enough to emphasize brick texture.
    • Keep colors true to life; your audience wants to see the actual LEGO shades.

    Free apps like Snapseed or Lightroom Mobile make quick, subtle edits easy and fun.

    6. Share Like a Pro

    • Choose your hero image: One strong shot is better than six average ones.
    • Add context: Share what inspired the build, piece count, or fun challenges you solved.
    • Show scale: Include a minifig or hand nearby for size reference.
    • Tag smartly: Use hashtags like #LEGOPhotography, #MiniMOD, #BrickArt.

    Next up: Scaling a Mini-MOD into a Full Diorama — turn small builds into immersive scenes with storytelling and layered composition.

  • 10 Creative Part Re-uses You Already Own

    10 Creative Part Re-uses You Already Own

    Stretch your parts library with clever swaps, flips, and hidden connections—no new bricks required.

    You don’t need rare pieces to build like a pro. The secret is re-thinking the pieces you already have. Below are ten everyday parts with fresh uses, plus quick challenges to try in your next mini-MOD.

    Pro tip: When repurposing a part, rotate it 90°/180° and test it “studs-not-up.” Many breakthroughs come from changing orientation.

    The List

    1) 1×1 Round Plate (stud)

    • Re-use: Hubcaps, café marquee bulbs, industrial rivets, tree fruit.
    • Detail trick: Stack with a 1×1 round tile for a finished “lens”.
    • Try this: Ring a doorway with evenly spaced “bulbs.”

    2) Clip & Bar Combo (e.g., Plate with Clip + 3L Bar)

    • Re-use: Hinged signage, adjustable mirrors, plant stems with poseable leaves.
    • Detail trick: Bar-in-clip creates thin, elegant greebles.
    • Try this: Build a micro-crane arm with two clips and one bar.

    3) Cheese Slope (1×1)

    • Re-use: Roof shingles, arrow indicators, animal ears, rock outcrops.
    • Detail trick: Alternate colors to create tiling gradients.
    • Try this: Texture a 6-stud wall using only cheese slopes.

    4) Headlight Brick (Erling)

    • Re-use: Studs-not-on-top (SNOT) anchor, micro-window recess, bumper detail.
    • Detail trick: Use the side stud to mount tiles as signage.
    • Try this: Build a 4-wide vehicle grille with alternating headlight bricks.

    5) 1×2 Jumper Plate

    • Re-use: Half-stud offsets for centered doors and rails.
    • Detail trick: Create subtle façades by nudging sections a half-stud forward.
    • Try this: Align a 3-wide window perfectly in a 4-stud panel using jumpers.

    6) Minifig Hands & Accessories

    • Re-use: Tiny brackets, vents, curtain rods, plant branches.
    • Detail trick: Pair a minifig hand with a bar to form ultra-thin rails.
    • Try this: Build a balcony with hand-as-bracket supports.

    7) 2×2 Round Tile / Dish

    • Re-use: Manhole covers, café tables, engine caps, speaker cones.
    • Detail trick: Printless dishes look great as modern signage circles.
    • Try this: Create a sidewalk scene with two “utility access” covers.

    8) Inverted Slope

    • Re-use: Under-eaves shaping, vehicle rocker panels, underside fairings.
    • Detail trick: Pair with normal slopes for smooth S-curves.
    • Try this: Give a micro-spaceship a sleek belly using inverted slopes.

    9) Telescope / 1×1 Round with Bar

    • Re-use: Exhaust tips, lamp housings, camera lenses, fence posts.
    • Detail trick: Stack into graduated pipes for industrial builds.
    • Try this: Build a rooftop HVAC cluster from “telescope” stacks.

    10) Hinges (Plate or Brick)

    • Re-use: Off-angle façades, rock strata, angled vehicle grilles.
    • Detail trick: Micro-mosaics pop when hinged at 15–30°.
    • Try this: Make a shopfront that opens like a book for access.

    How to Practice Part Re-use (15-Minute Drill)

    1. Pick any part from the list.
    2. Brainstorm 5 non-obvious uses; sketch or test quickly.
    3. Lock one idea and make a 6×6 vignette using ≤ 30 pieces.
    4. Photograph at a 45° angle; note the “hero” part in your caption.
    Constraint idea: Limit yourself to 3 colors + neutrals and finish in under 15 minutes to keep momentum high.

    Want more skill-building posts? Next up: Photograph Your LEGO Builds Like a Pro and Scaling a Mini-MOD into a Full Diorama.

  • Unlocking Creativity: How to Make Mini MOD Builds with Everyday Pieces

    Unlocking Creativity: How to Make Mini MOD Builds with Everyday Pieces

    A quick-start guide to bite-size, display-ready creations using the parts you already own.

    Have you ever looked at your parts bin and thought, “What if I could build something awesome with just what’s already here?” That’s the spirit of this guide. Below, you’ll learn how to design mini MOD (My Own Design) builds—small, creative projects that push your imagination without requiring massive inventories.

    Why Mini MOD Builds Are So Great

    • Accessible: Start now with what you’ve got—no rare parts required.
    • Manageable: Finish a mini build in a single session for instant satisfaction.
    • Creative: Constraints spark clever solutions and “aha!” moments.
    • Display-friendly: Perfect for desks, shelves, and photography.

    Step-by-Step: From Idea to Mini Masterpiece

    Step 1: Pick Your Theme or Concept

    Choose a simple idea you love to guide colors, parts, and constraints:

    • Retro convertible and roadside café
    • Micro-space station or lunar rover
    • Tiny treehouse or urban rooftop garden
    • “Day in the life” vignette with one minifig

    Step 2: Set Your Constraints

    Constraints make the build fun. Try one or more:

    • Use ≤ 50 pieces.
    • Fix your footprint (e.g., 16×16 or 12×12 studs).
    • Limit the palette to 3 colors plus neutrals.
    • Include one “unexpected” part repurposed in a new way.
    • Build in under 1 hour.

    Step 3: Gather & Organize Parts

    • Pull plates, slopes, and tiles as your core kit.
    • Pick 1–2 “hero” parts to center the design around.
    • Sort by color/type for quick scanning.
    • Improvise substitutes—mini builds thrive on part re-use.

    Step 4: Rough Layout & Key Modules

    Sketch the main modules, then build them separately:

    • Module A: Base & terrain/flooring
    • Module B: Feature object (car, building, treehouse)
    • Module C: Minifig or accessory scene

    Step 5: Combine & Refine

    • Stability: Remove weak hinges/overhangs.
    • Visual flow: Guide the eye to a clear focal point.
    • Play/display value: Pose minifigs; add small details.

    Step 6: Photograph & Share

    • Use a simple background (paper, gray board, or window light).
    • Shoot at a dynamic 45° front-left angle.
    • Add a close-up of one clever part re-use.
    • List your constraints (“50 pieces, 3 colors”) to invite challenges.

    Step 7: Reflect & Iterate

    • What worked best—and why?
    • What would you tweak next time?
    • Could you push constraints further (fewer pieces, smaller base)?
    • Can this mini scale into a mid-size build?

    Quick Build Challenge — “Retro Drive & Café”

    • Pieces: 60 or fewer
    • Palette: Red, Black, Gray + neutrals
    • Footprint: 16×16 studs
    • Theme: Vintage convertible outside a small café with one minifig
    • Special part: Use a 1×1 round tile as a hubcap or café light

    Build order tip: Start with the car (Module B), add the café façade (Module A), then pose the minifig (Module C). Combine, photograph, and share!

    Why This Fits TacoCat in Texas

    With a vibrant, fiesta-forward vibe (like the banner above), mini builds let your community grab quick wins, flex creativity, and share colorful results. They’re ideal for weekend builders, educators, parents-and-kids, and anyone wanting a satisfying creative break—no giant parts stash required.

    Want more like this? Next up: 10 Creative Part Re-uses You Already Own, Photograph Your LEGO Builds Like a Pro, and Scaling a Mini-MOD into a Full Diorama.

  • Alcatraz Federal Penitentiary Lego Fan Plans

    Alcatraz LEGO build plans banner

    Alcatraz Federal Penitentiary

    Lego Fan Plans • Multi‑story detailed interior • Cell blocks, mess hall, exercise yard, watch towers • Island + dock choices • LEGO vibe

    Build a structured prompt from the menus; click Generate to assemble four variants. Copy an individual level or use Copy All. When ready, click Export for Make‑It Blocks to copy a converter‑ready plan (Title → BOM → Steps → Notes).
    Tip: On desktop, use Ctrl/Cmd‑click for multi‑select; on mobile, tap to add / tap again to remove.

    Basic

    Intermediate

    Advanced

    Crazy Wild

  • Famous Aircraft Carriers From History

    Aircraft carrier LEGO build plans banner

    Famous Aircraft Carriers From History

    Real‑Build Mode • Full hangar & deck views • Interior modules • Up to 36″ long • LEGO vibe

    Build a structured prompt from the menus; click Generate to assemble four variants (Basic → Crazy Wild). Copy an individual level or use Copy All.
    Tip: On desktop, use Ctrl/Cmd‑click for multi‑select; on mobile, tap to add / tap again to remove.

    Basic

    Intermediate

    Advanced

    Crazy Wild

  • Modern fighter jets from around the world

    Jet fighter LEGO build plans banner

    Jet Fighters From Around The World

    Lego Fan Plans • Real‑Build Mode • Legal techniques • BrickLink‑ready BOM • LEGO vibe

    Build a sharp, copy‑ready prompt from the menus; click Generate to assemble four variants. Copy an individual level or use Copy All.
    Tip: On desktop, use Ctrl/Cmd‑click for multi‑select; on mobile, tap to add / tap again to remove.

    Basic

    Intermediate

    Advanced

    Crazy Wild