Author: Clark2368

  • Famous Saloons of the Old West Lego Fan Plans

    Famous Saloons of the Old West

    Lego Fan Plans

    REAL-BUILD MODE Made With Legal Techniques

    Level 1 — Basic Snapshot

    Level 2 — Builder Brief

    Level 3 — Detailed Prompt

    Level 4 — Pro / Crazy Detail

  • Life Size Jet Fighter Pilot Helmet — Lego Fan Plans

    Life Size Jet Fighter Pilot Helmet — Lego Fan Plans

    REAL-BUILD MODE With Legal Techniques

    Level 1 — Basic Snapshot

    Level 2 — Builder Brief

    Level 3 — Detailed Prompt

    Level 4 — Pro / Crazy Detail

  • D-day Omaha Beach Diorama Lego Fan Plans

    D-day Omaha Beach Diorama Lego Fan Plans

    Real-Build Mode • Menus on top (2×6) • Four prompt boxes on bottom (2 columns).
    Notes: beach head • landing craft with tanks • sea wall with bunkers & MG nests • green US uniforms & gray German uniforms • supply depot • highly detailed

    Level 1 — Basic Snapshot

    Level 2 — Builder Brief

    Level 3 — Detailed Prompt

    Level 4 — Pro / Crazy Detail

  • Ice Station Zebra Arctic Submarine Base Lego Fan Plans

    Ice Station Zebra Arctic Submarine Base

    Level 1 — Basic Snapshot

    Level 2 — Builder Brief

    Level 3 — Detailed Prompt

    Level 4 — Pro / Crazy Detail

  • Sink The Bismarck — German Battleship — LEGO Fan Plans

    Sink The Bismarck — German Battleship — LEGO Fan Plans

    Sink The Bismarck — German Battleship — LEGO Fan Plans

    • In May 1941, the German battleship Bismarck and the cruiser Prinz Eugen broke into the North Atlantic to raid Allied shipping.
    • On May 24, at the Battle of the Denmark Strait, Bismarck sank the British battlecruiser HMS Hood and damaged HMS Prince of Wales, but was hit in return and began a running fight toward France.
    • After a massive pursuit, HMS Ark Royal’s slow but rugged Fairey Swordfish torpedo-bombers struck on May 26, jamming Bismarck’s rudder.
    • At dawn on May 27, Royal Navy battleships engaged; the cruiser HMS Dorsetshire delivered the final torpedoes as Bismarck’s crew scuttled the ship.
    • This generator focuses on a LEGO diorama featuring the iconic participants: HMS Hood, HMS Prince of Wales, HMS Dorsetshire, Ark Royal’s Swordfish aircraft, and Bismarck.

    Level 1 — Basic Snapshot

    Level 2 — Builder Brief

    Level 3 — Detailed Prompt

    Level 4 — Pro / Crazy Detail

  • Can I Make Money Selling My LEGO MODs?

    Can I Make Money Selling My LEGO MODs? (SEO Guide for 2025)

    Yes. Here’s the complete playbook to sell digital instructions, parts packs, and custom commissions — with on-page SEO that ranks and converts.

    sell LEGO MOCs LEGO MOD instructions LEGO micro builds for sale how to sell LEGO builds LEGO side hustle ideas 2025

    3 Proven Ways to Earn with LEGO MODs

    1) Digital Instructions (Highest ROI)

    • Create clean PDF/Studio files; sell via Payhip (on your WP site), Rebrickable, or Etsy.
    • Target long-tails like “mini LEGO instructions under 100 pieces”.
    • Add a top-of-post CTA: Download Instructions + Get Parts List.

    2) Physical Kits & Parts Packs

    • Keep builds < 100 pieces for low shipping and quick fulfillment; include printed guide.
    • SEO title formula: “LEGO Micro Build Kit – [Theme] (100% LEGO parts)”

    3) Commissions & Displays

    • Offer custom dioramas for events, stores, classrooms.
    • Service keywords: LEGO custom commission, LEGO diorama builder.
    Fastest to launch: Start with one polished Mini-MOD PDF, then bundle three into “MOD U Set 1”.

    On-Page SEO That Works in 2025

    • One long-tail focus per post (e.g., “sell LEGO MOCs on Etsy”).
    • Schema: Article on posts; Product on instruction pages; HowTo on tutorials.
    • Internal links to MOD U classes (workflow, color/contrast, photography).
    • Scannable layout: H2/H3, bullets, and an above-the-fold CTA.
    Image SEO: Use WEBP/JPG, descriptive file names, and alt text like “micro LEGO street cart instructions”.

    Pricing Benchmarks

    Product TypeIdeal PricePlatformTypical Margin
    PDF Instructions (≤100 pcs)$3–$7Payhip / Rebrickable / Etsy90–95%
    Printed Guide + Parts Pack$12–$25Etsy / Shopify60–70%
    Custom Diorama Commission$75–$250Direct / Portfolio80%+

    High-Conversion Funnel for MOD U

    1. Traffic: SEO posts (Tips of the Trade, How to Build a Mini-MOD).
    2. Lead Magnet: Free 20-piece Starter MOD PDF (email capture).
    3. Offer: 3-pack of themed micro builds (“MOD U Set 1”).
    4. Trust: Real build photos, parts counts, testimonials.
    5. CTA: “Download Instructions” / “Get Parts List”.

    Legal & Brand Safety

    • Say “compatible with LEGO® bricks”; do not imply official affiliation.
    • Use only genuine LEGO parts; avoid protected logos/trade dress in packaging.
    • Brand your products as MOD U fan-made designs.

    Turn Your Mini-MOD Into Income

    Follow the 3-step path: learn a technique → package instructions → publish a product page.

    • Pick a proven lesson to build fast
    • Export clean PDF instructions + parts list
    • List on Payhip/Rebrickable and link from your post
  • Tips of the Trade

    MOD U: Tips of the Trade

    Simple habits, hidden shortcuts, and veteran tricks to make your Mini-MODs look like they belong in a LEGO designer’s showcase.

    1) Mindset First — Build Small, Think Big

    The best builders don’t think about the number of pieces; they think about the story per stud. Every 4×4 area should earn its space. If it doesn’t tell part of your story, pull it and simplify.

    Rule of halves: If your build looks cluttered, remove half the colors or half the parts—clarity always wins.

    2) Sort for Speed, Not Perfection

    Forget perfect sorting bins. Keep a “speed tray” of versatile elements—brackets, jumpers, clips, bars, and 1×2 plates. These are the Swiss Army parts of Mini-MODs. A 10-minute pre-sort before building pays dividends in creativity.

    • Use muffin tins or small bowls for quick categories (plates, slopes, clips, tiles).
    • When an idea strikes, grab your tray and start building right away.
    • Clean up after each MOD; it resets your creative flow.

    3) Reinforce Early, Not Late

    New builders tend to decorate first, then fix structure later. Pros flip that. Start every build by locking sub-assemblies with perpendicular connections, even if it’s ugly for a few minutes. Once solid, you can skin it with details.

    If your MOD survives a gentle shake test before detailing, it’ll handle transport and photography without falling apart.

    4) Small Details, Big Impact

    • Use minifig accessories for micro details (whips, horns, wands = pipes, cables, brackets).
    • Pair clip + bar combos for angled handrails or tiny signposts.
    • Mix tile finishes: Matte + glossy tiles create texture contrast in photos.
    • One-off Easter eggs like a hidden frog or classic logo bring joy and shareability.
    🧱 Pro Trick: Place one stud off-grid using a jumper—instant asymmetry that makes micro-builds feel more natural.

    5) Color Management 101

    Don’t color by availability—color by intent. Use the H+S+N+A rule (Hero + Support + Neutrals + Accent) from the previous class. Build in grayscale first, then add color last; this forces your design to read by form and contrast, not hue.

    • Limit yourself to 3–4 hues per build.
    • Keep bright colors close to the focal object.
    • Use tiles of different sheen to simulate lighting variation.

    6) Display & Photography

    Presentation sells your build. Even the simplest MOD looks professional with clean lighting and background separation.

    • Shoot near a bright window, with light at 45° to the build.
    • Use a plain background: white, light gray, or light blue works best.
    • Hold a white sheet of paper opposite the light to bounce shadows.
    • Keep your phone camera low—eye-level gives your micro-build scale.
    Editing tip: Increase contrast slightly, drop saturation a touch, and sharpen edges. That’s all it takes.

    7) Finishing Touches Pros Never Skip

    • Tile visible base edges to make them photo-ready.
    • Check color alignment (especially stripes and signage).
    • Add one subtle storytelling clue (a fallen cone, open drawer, or minifig handprint).
    • Give the build a nameplate tile—it feels complete.

    8) Reflection & Rebuild

    Don’t stop when the MOD is “done.” Rebuild it with one self-imposed restriction: fewer parts, new palette, or different angle. This is where you move from casual builder to designer.

    What’s Next?

    Apply these trade secrets to your next Mini-MOD challenge—then share your before/after photos for community feedback. Every iteration sharpens your design instincts.

    Return to MOD U Home
  • Color & Contrast Mastery for Mini-MODs

    MOD U Class: Color & Contrast Mastery for Mini-MODs

    Pick palettes with purpose, place accents like a pro, and make tiny builds read clearly at a glance.

    Why Color Rules Mini-MODs

    • Readability: Clear palette hierarchy makes small builds instantly understandable.
    • Focus: Accents steer the eye to your hero detail or story beat.
    • Mood: Warm vs. cool tones shift the scene’s energy without extra parts.
    Guiding idea: One hero color, one support color, neutrals for structure, and tiny bright accents near the focal point.

    Palette Formulas that Just Work

    H+S+N+A (Hero + Support + Neutrals + Accent)

    • Hero: your headline hue (e.g., red kiosk).
    • Support: complementary or analogous (e.g., dark tan).
    • Neutrals: light/dark gray, black, white.
    • Accent: tiny pop (e.g., bright yellow transparent rounds).

    Two-Tone + Metal

    • Two main hues, plus dark bluish gray/black as “metal.”
    • Great for vehicles and micro-mechs.
    Market Kiosk: Red hero • Dark tan support • Grays neutral • Yellow accent
    Rooftop Garden: Blue hero • Green support • Light gray neutral • Orange accent
    Industrial Micro-Mech: Dark grays hero/support • Black neutral • Yellow hazard accent
    Beach Cart: Teal hero • Sand yellow support • Light gray neutral • Red accent

    Contrast: Make the Focal Pop

    • Value contrast: Place light tiles against dark plates (or vice versa) around your hero.
    • Hue contrast: Use the accent sparingly—near signage, eyes, or control panels.
    • Edge clean-up: Keep the base’s perimeter one consistent neutral for a framed look.
    • Selective tiling: Tile near the focal, leave studs in the background for texture depth.
    Rule of Small Accents: Keep accents under ~5% of the build. If you see them everywhere, they aren’t accents.

    Smart Placement Patterns

    • Halo the Hero: A ring of slightly lighter tiles around a dark hero object (or the reverse) frames it instantly.
    • Diagonal Flow: Run your hero color in a subtle diagonal—eye movement feels dynamic on small builds.
    • Vertical Anchor: Stack a 1×1 accent “light post” near the focal to pin the viewer’s attention.
    • Shadow Push: Add a canopy or recess behind the hero to create natural contrast without new hues.

    Common Pitfalls & Quick Fixes

    • Too many brights: Remove two colors; reassign to neutral. Keep one bright as the accent.
    • Muddy midtones: Add a single light tile “stripe” or a dark outline to define shapes.
    • Busy edges: Standardize the base rim color; tile the rim last.
    • Hero lost: Reduce support color near the focal; boost value contrast there.

    20-Minute Palette Workout

    1. Pick an H+S+N+A combo from the swatches above (or invent one).
    2. Lay a 12×12 footprint using only neutrals.
    3. Place your hero object (use the hero hue on 60% of it).
    4. Add support color in two small regions (not everywhere).
    5. Place three accent studs/tiles around the focal—no more.
    6. Photograph at 45° front-left; if the focal doesn’t read in 1 second, increase value contrast.
    Test trick: Snap a phone pic and view it in grayscale—if the hero still stands out, your value contrast is solid.

    Color Readability Checklist

    • ✔ One clear hero hue (largest area at focal)
    • ✔ One support hue (limited regions)
    • ✔ Neutrals ground the build and frame edges
    • ✔ Accents < 5% and near story beats
    • ✔ Value contrast around the hero is obvious in grayscale

    What’s Next?

    Apply this palette method to a 16×16 street-corner vignette, then try the same scene with a different hero color and compare results.

    Start with the MOD U How-To
  • MOD U — LEGO Mini Build University MOD U — Mini-Build University

    MOD U — LEGO Mini Build University

    MOD U — Mini-Build University

    Bite-size lessons, bold color, real-build techniques. Learn fast, build smart—no rare parts required.

    Mini-MOD Part Re-use Photography Workflow Business & SEO Pro Tips

    Unlocking Creativity: Mini MOD Builds

    Design colorful, bite-size builds with parts you already own—finish in one sitting and learn repeatable techniques.

    Lesson • Creativity & Constraints
    Start Lesson

    Color Blocking That Pops

    Use limited palettes, value contrast, and accent rules so your mini-MOD reads instantly at thumbnail size.

    Lesson • Color & Readability
    Start Lesson

    10 Creative Part Re-uses You Already Own

    Flip, offset, and repurpose common pieces for pro-level detail, cleaner SNOT, and stronger connections.

    Lesson • Techniques
    Read Lesson

    Photograph Your LEGO Builds Like a Pro

    Simple lighting, clean backgrounds, and smart angles—make your creations pop without fancy gear.

    Lesson • Presentation
    Read Lesson

    MOD U: Build a Mini-MOD from Scratch

    A step-by-step workflow: spark → sketch → sturdy display build in one session, with story-first details.

    Lesson • Workflow
    Start Building

    Can I Make Money Selling My LEGO MODs?

    Yes—sell digital instructions, parts packs, and commissions with SEO that ranks and converts in 2025.

    Lesson • Business & SEO
    Read Guide

    MOD U: Tips of the Trade

    Veteran habits and shortcuts for stronger structure, cleaner color, and pro presentation—fast.

    Lesson • Pro Tips
    Read Tips

    Ready for the Next Challenge?

    Pick a lesson, set a 60-minute timer, and post your mini-MOD with the constraints you used. Then scale your favorite into a micro-diorama.

    Begin with “Unlocking Creativity”
  • MOD U: How to Build a Mini-MOD from Scratch (Step-by-Step)

    MOD U: How to Build a Mini-MOD from Scratch (Step-by-Step)

    From spark → sketch → sturdy display piece. A friendly workflow you can finish in one sitting.

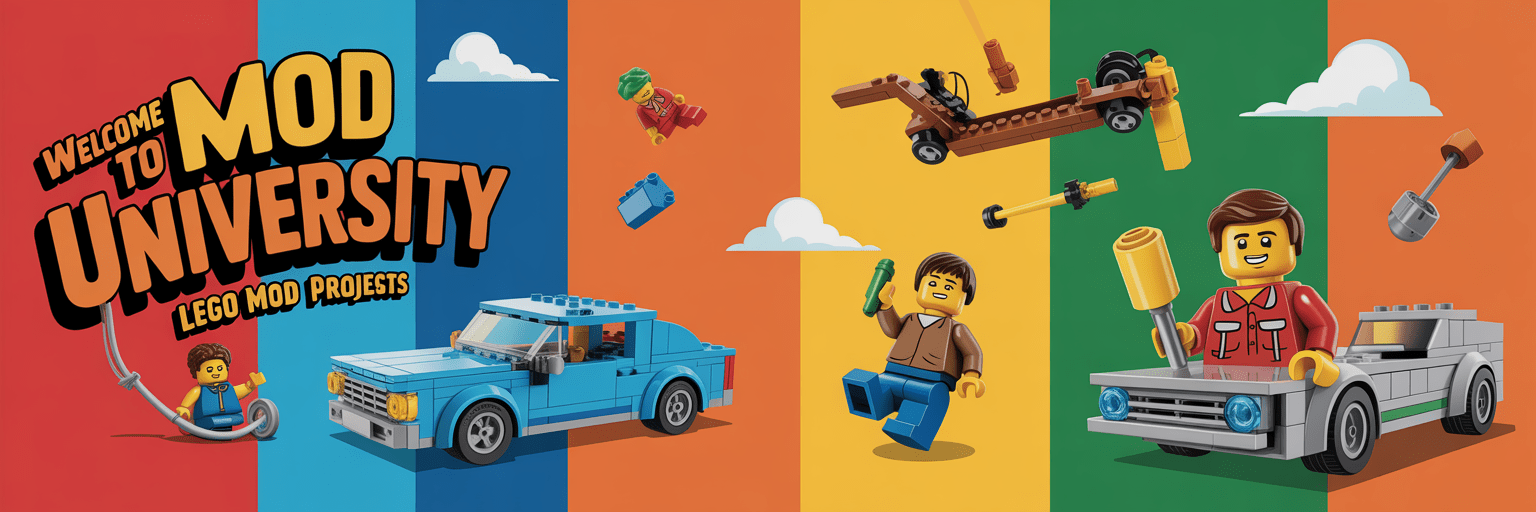
    Welcome to MOD U—your classroom for turning loose LEGO parts into polished, display-ready micro-builds. Whether you’re a weekend builder or an educator looking for fast classroom projects, this method takes you from idea to finished piece without needing rare parts or expensive sets.

    Mindset: Constraints fuel creativity. Small builds become masterpieces when you set clear limits and follow a story.

    1) Pick a Spark & Set Constraints

    • Spark: Choose a theme—street cart, garden nook, micro-mech, or tiny kiosk.
    • Footprint: 12×12 or 16×16 studs.
    • Pieces: 60 or fewer.
    • Palette: 3 colors + neutrals.
    • Time: 60 minutes start-to-finish.

    2) Choose a Balanced Palette

    • Pick one hero color and one support tone.
    • Keep neutrals (gray, tan, black) for grounding.
    • Save bright accents for signage, windows, or lighting details.

    3) Sketch Your Build Modules

    • Module A: Base or terrain.
    • Module B: Main object or structure.
    • Module C: Story beat—minifig or prop that adds life.
    Pro tip: Use 1×2 jumpers for half-stud offsets to center doors, rails, and signs.

    4) Build for Strength

    1. Stack plates for the base; tile selectively for texture.
    2. Use brackets or headlight bricks for clean SNOT faces.
    3. Lock subassemblies together before adding delicate details.
    4. Run the “shake test”—if it rattles, reinforce hidden joints.

    5) Detail & Storytelling

    • Clips + bars make lamps, rails, and scaffolds.
    • Cheese slopes = shingles or rocky texture.
    • Transparent rounds = bulbs, drinks, or gauges.
    • Minifig hands + bars = tiny brackets or hinges.

    6) Photograph the Final Build

    • Use window light and a white poster board background.
    • Shoot a 45° front-left “hero” view plus a low eye-level angle.
    • Bounce light with white card to soften shadows.
    • Keep color edits minimal—show true LEGO hues.

    7) The 30-Minute MOD U Challenge

    1. Pick a theme & palette (3 min)
    2. Build base (7 min)
    3. Hero object (12 min)
    4. Add story beat (6 min)
    5. Polish & photo (2 min)
    Share it! Post your mini build with your constraints listed—challenge others to remix your setup.

    8) Reflect & Level Up

    Review what worked, what wobbled, and what popped visually. Take one photo, then rebuild it in a different theme or palette. Iteration is how you develop your signature MOD style.

    What’s Next?

    Ready to go beyond single-scene builds? Explore Mini-MOD Challenges on TacoCat in Texas for themed prompts, real-build examples, and printable guides.

    Explore More MOD U Lessons

    Graduation goal: Complete three mini-MODs in a week. When you’ve found your favorite, expand it into a full diorama using our next guide: “Scaling a Mini-MOD into a Full Diorama.”