Adapting Revell Plastic Kit Parts for LEGO MOD Cars
A practical, no-drama approach to using select model-kit pieces for realism and function—while LEGO stays the structural truth.
Moving Beyond the “Pure LEGO” Stigma
For years, a quiet rule has hovered over LEGO vehicle builds: “If it isn’t LEGO, it doesn’t belong.” That rule made sense when builds were simple and judged primarily on part purity. But modern car MODs—especially when you’re chasing believable race-car proportions—hit a wall: reality demands thin, scale-correct surfaces and mechanical depth.
Hybrid is not cheating. It’s a build philosophy: LEGO handles structure, alignment, clutch power, and repeatable geometry. Select kit parts handle finesse where bricks get bulky.
The golden rule: LEGO is the chassis and structure; kit parts are surface, depth, or overlays. Never let non-LEGO parts become load-bearing or geometry-critical.
Why This Works: Different Materials, Different Jobs
LEGO is unbeatable for strength and modular design. But it’s limited by stud geometry, wall thickness, and legal connection rules. Model kit parts shine where LEGO is forced to “approximate.”
- Thin aero (diffuser strakes, endplates, vents)
- Mechanical realism (vented brake rotors, exhaust barrels)
- Interior texture (switchgear, gauge clusters)
- Surface continuity (liners and inserts that remove empty voids)
Clean Integration Methods (No Glue on LEGO)
Hybrid builds fail when the attachment method is messy. The goal is reversible, serviceable, and repeatable.
Attachment methods that work
- Clip capture: clamp a thin kit tab/edge using LEGO clips (diffusers/endplates).
- Tile sandwich: trap thin plastic sheets between tiles/plates (liners/undertrays).
- Removable tape: clear acrylic double-sided tape on tile carriers (small inserts).
- Micro magnets: magnets in LEGO “carriers” + kit part (clean modular swaps).
- Pinned receivers: glue a Technic pin receiver into the kit part—never into LEGO.
Reality check: If a hybrid part can’t be removed for maintenance, it will eventually cause frustration. Build it like a real car: serviceability is a feature.
10 Light-Bulb Ideas for LEGO Vehicle MODs (Not Obvious Stuff)
These solve common LEGO car problems—bulk, emptiness, and “toy thickness”—without undermining build integrity.
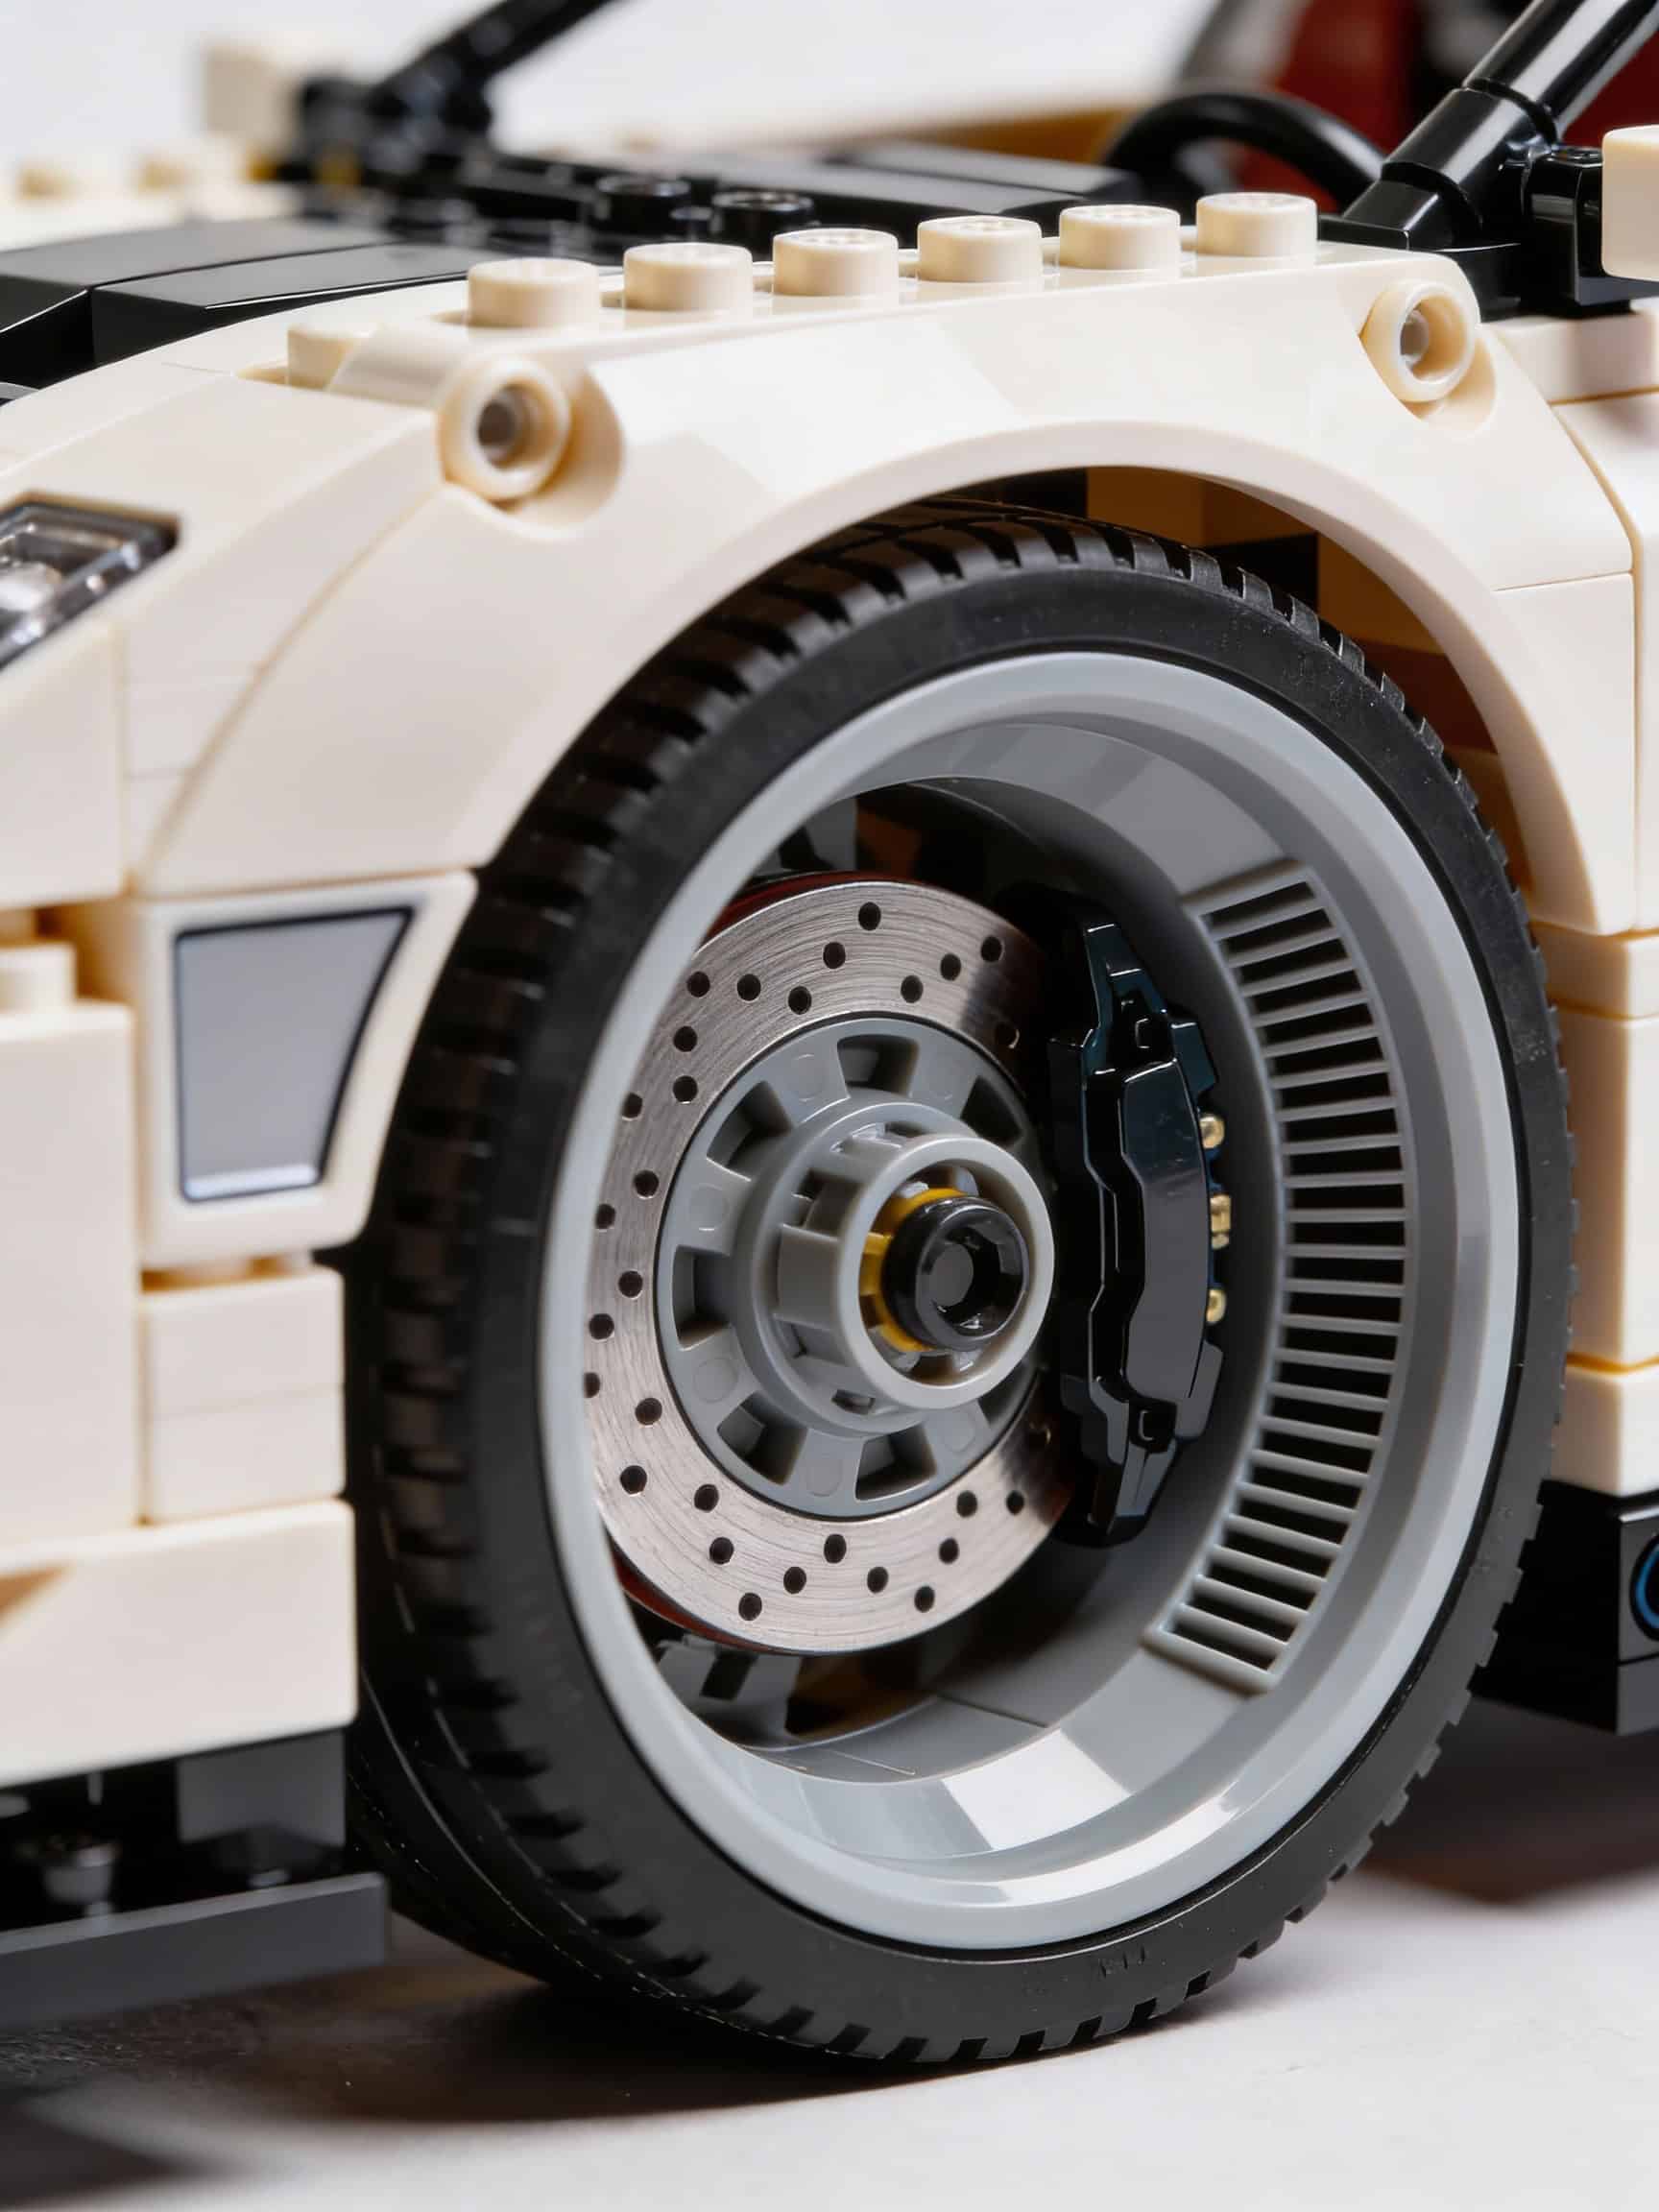
1True-Scale Brake Rotors Behind LEGO Rims
Mount vented kit rotors as a non-load overlay for real depth—especially on low-stance builds.
2Venturi Under-Body Tunnels (Flat Floor + Channels)
Create thin aero tunnels with kit panels over a LEGO frame; suddenly it reads “race engineering.”
3“Visual Engine” Layer Over a Functional LEGO Core
Hide LEGO mechanism below; mount a kit engine block above purely as a display layer.
4Inner Fender Liners That Remove “Empty Wheel Wells”
Thin liners make stance feel lower without changing suspension geometry and hide voids.
5Scale-Correct Rear Diffusers With Real Strake Depth
Kit strakes are thin enough to look real; mount via clips so the assembly stays removable.
6Functional-Looking Intake Ducting (Not Just Holes)
Route believable ducts from grille to “intercooler” zones; empty space becomes purpose.
7Interior Switchgear Inserts (Fix the Scale Break)
Use kit textures on tile carriers: gauges, toggles, vents—without making the cabin bulky.
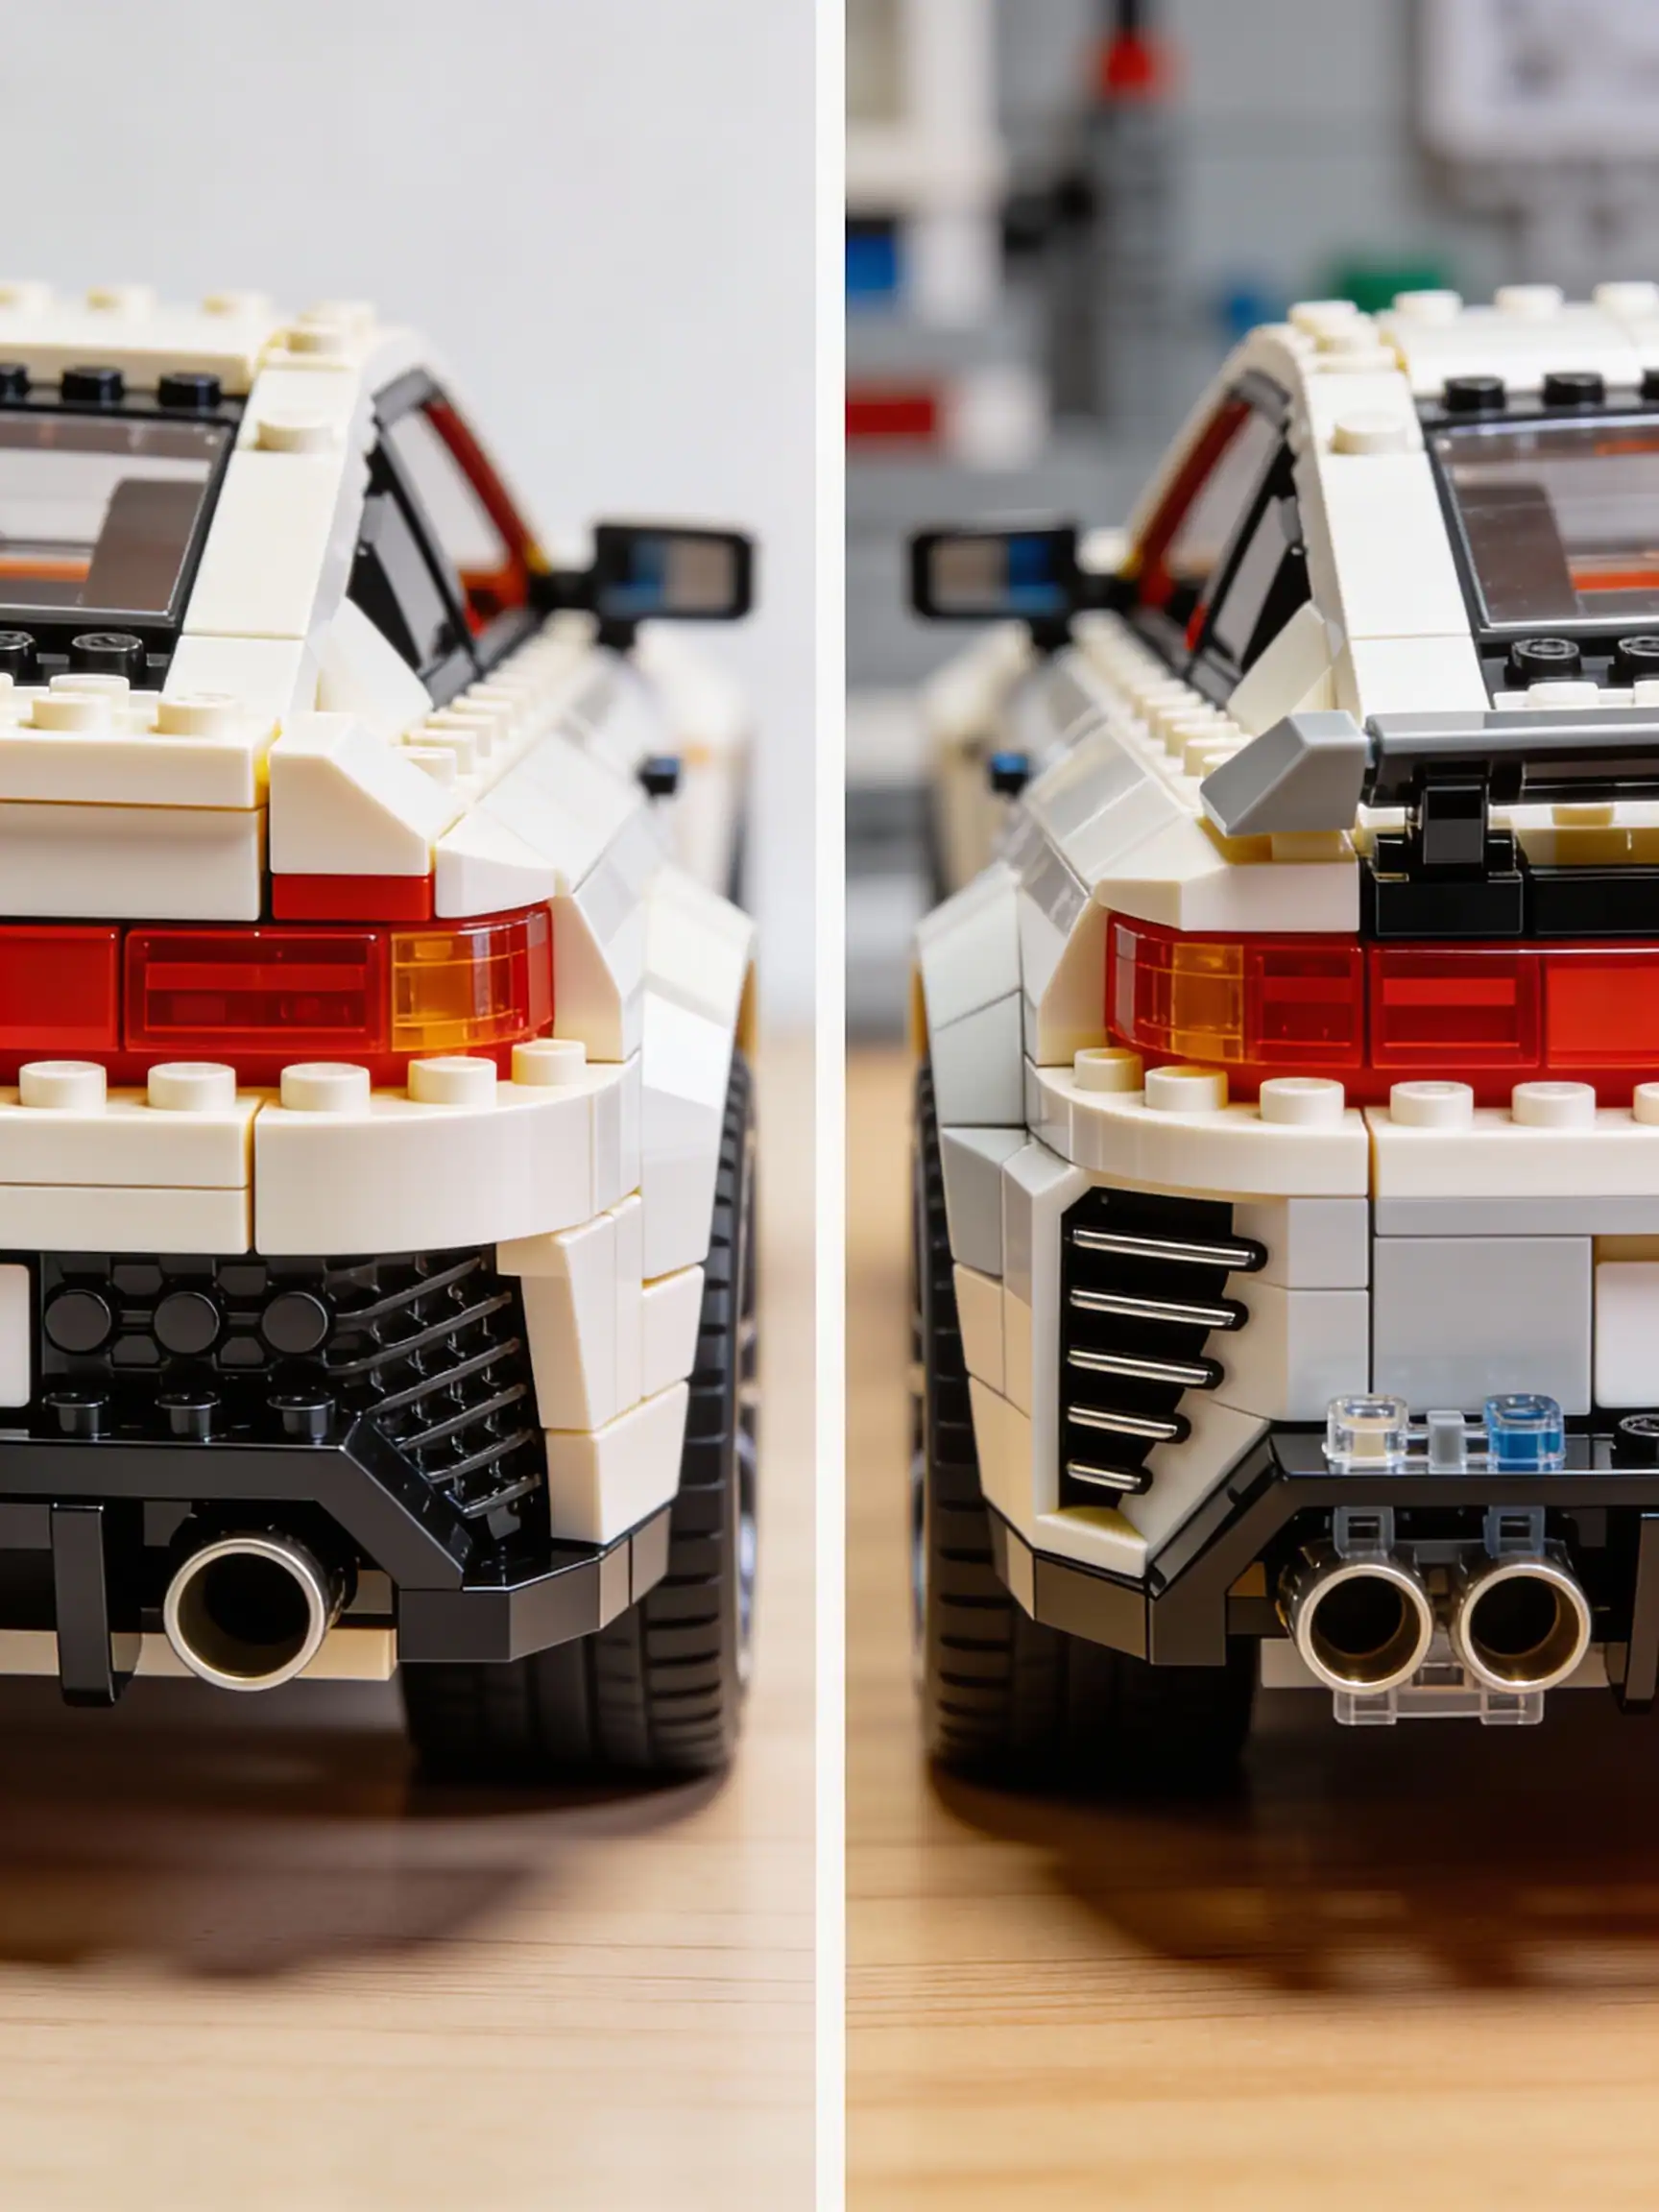
8Thin Spoiler Endplates With Correct Angles
Brick endplates read thick; kit endplates let you taper and angle like real carbon panels.
9Hollow Exhaust Tips With Real Depth
Slip hollow kit barrels over LEGO core mounts; it removes the “blocked tube” toy look.
10Headlight Internals, Not Just Clear Covers
Reflectors + bulb geometry behind a clear LEGO lens creates true optical depth.
Final Thought: Build What Works
The “pure parts” debate is cultural. Your model’s believability is mechanical. Keep LEGO as the structural system and treat kit parts as reversible overlays, and you’ll get sharper realism without breaking the LEGO foundation.
Hybrid standard: If you want changes—color, stance, wheels, interior, aero, features—update the plan and iterate. Real builds evolve.